
Workflow in Microsoft Dynamics 365 FO is used to automate business processes. Workflow in Microsoft Dynamics 365 F&O defines how document/record is moved through the system, approvals on the record, and decisions required at each step. So basically to understand we will take an example of a PO. Let’s just say I create a PO to buy 5 Laptops for my organization and the total cost of all the laptops is 10 lakh. and my Limit on the organizational level is limited at 5 lakh. so in workflow configuration as per a typical scenario, it will go to my manager whose limit is much greater than mine, then he will approve it or reject it depending on his decision. Configuration for workflow can be done from the front end, without any programming skills.
How to create a custom workflow:
I will be creating the custom workflow in Microsoft Dynamics 365 fo for the SCRF table(custom).
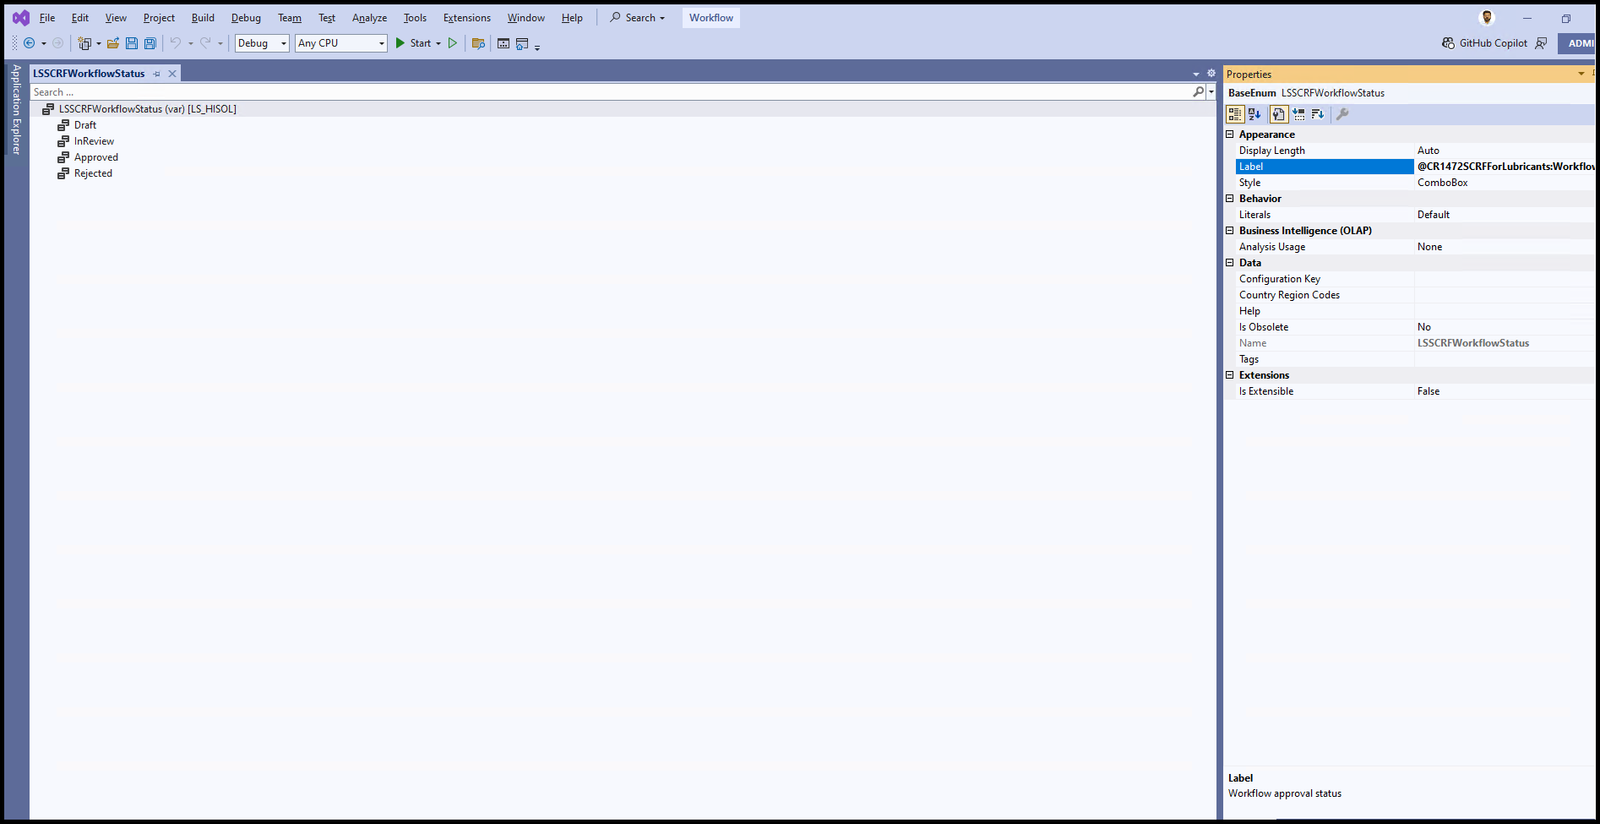
Step 1 for Workflow in Microsoft Dynamics 365 FO. Create an Enum which has the following enum values, in my case, I have created LSSCRFWorkflowStatus. It will have 4 elements
Draft
InReview
Approved
Rejected
as shown in the below picture. Make sure to create the elements in the above chronology only as by default new record should have Draft as a default value.
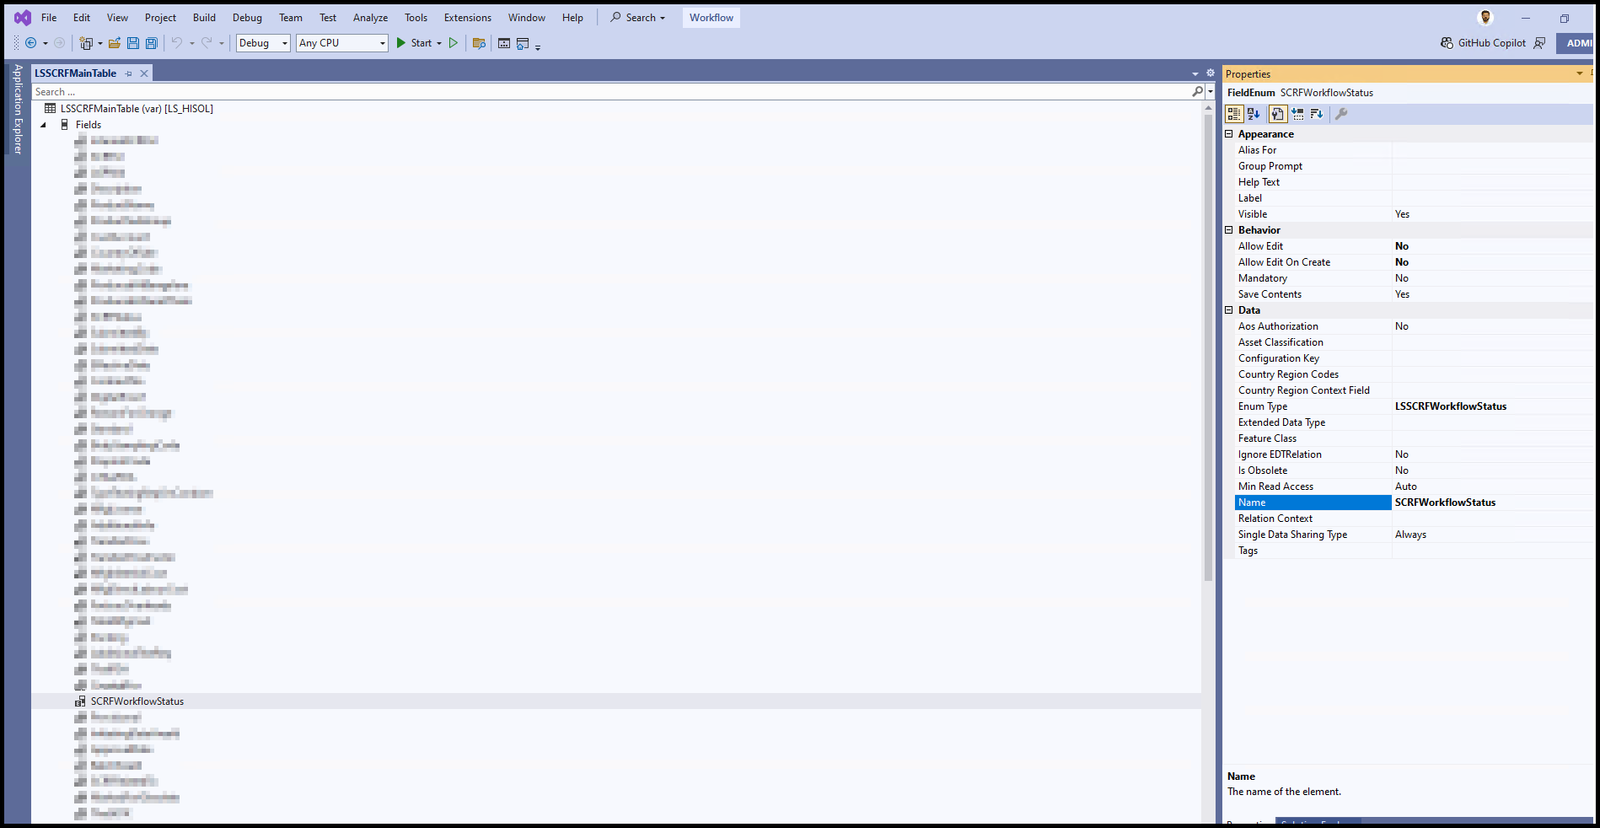
Step 2 for Workflow in Microsoft Dynamics 365 FO. Now drag and drop this Enum in the table in which you want to apply the workflow, In my case I will be adding this enum in LSSCRFMainTable (this is a custom table) as shown below.
And make the field property
‘Allow Edit‘ as No
‘Allow Edit on Create‘ as No
Step 3 for Workflow in Microsoft Dynamics 365 FO. Now go to the table methods and override ‘canSubmitToWorkflow‘ method and write code as shown below
/// <summary>
/// Return if user can submit scfr workflow
/// </summary>
/// <param name = "_workflowType">str</param>
/// <returns>If true user can else false</returns>
public boolean canSubmitToWorkflow(str _workflowType = '')
{
    boolean ret;

    ret = super(_workflowType);

    if  (this.RecId &&
        (this.SCRFWorkflowStatus == LSSCRFWorkflowStatus::Draft ||this.SCRFWorkflowStatus == LSSCRFWorkflowStatus::Rejected))
    {
        ret = true;
    }

    return ret;
}
Step 4 for Workflow in Microsoft Dynamics 365 FO. Now create another method ‘updateWorkflowStatus‘ on the table and write code as shown below
/// <summary>
/// Update the value in <c>LSSCRFMainTable</c> when workflow status changes
/// </summary>
/// <param name = "_recId">Recid of current record</param>
/// <param name = "_status">LSSCRFWorkflowStatus</param>
public static void updateWorkflowStatus(RefRecId _recId, LSSCRFWorkflowStatus _status)
{
LSSCRFMainTable mainTable;
ttsbegin;
select firstonly forupdate mainTable
where mainTable.RecId == _recId;
mainTable.SCRFWorkflowStatus = _status;
mainTable.update();
ttscommit;
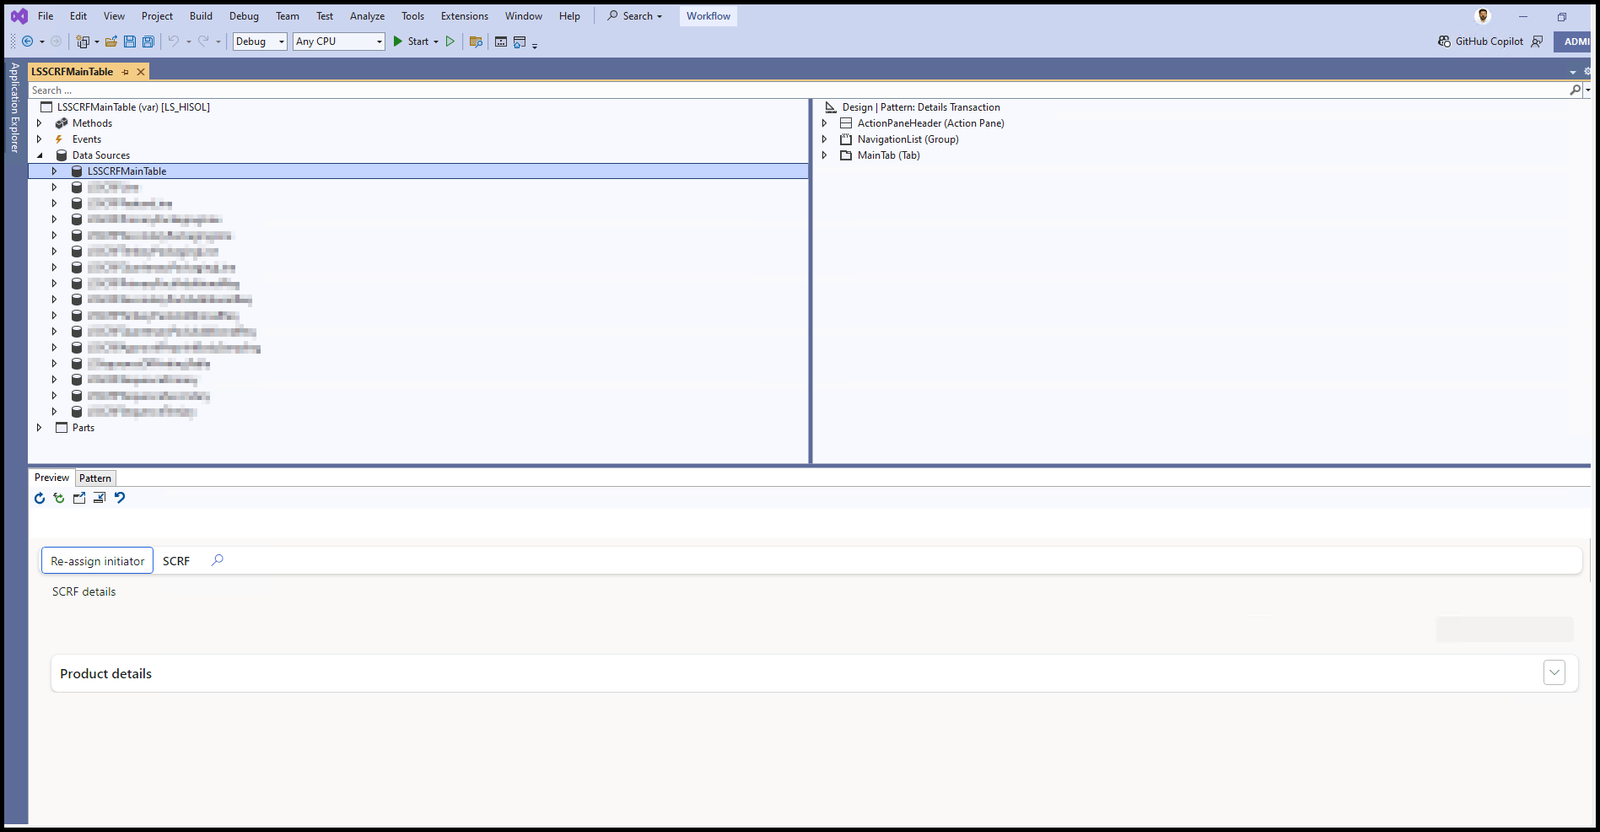
}Step 5 for Workflow in Microsoft Dynamics 365 FO. Now create a form and put the data source as the above table, in my case my form is ‘LSSCRFMainTable‘ and create design and add controls in the design.
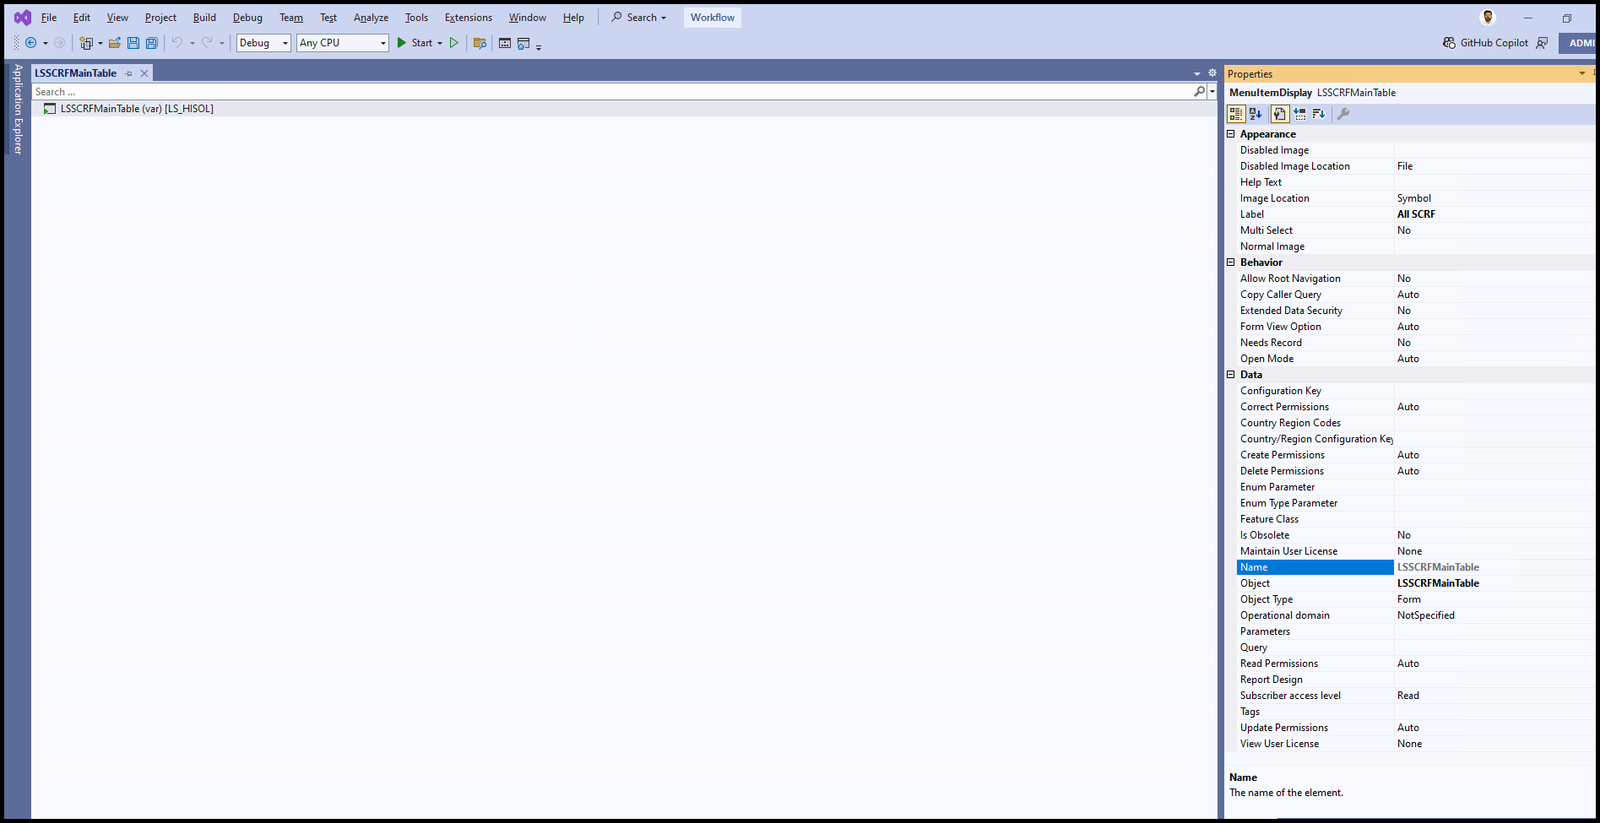
Step 6 for Workflow in Microsoft Dynamics 365 FO. Now create a display menu item for the form and set the
Object type property as Form
Object property as FormName (In my case LSSCRFMainTable)
Step 7 for Workflow in Microsoft Dynamics 365 FO. Add the display menu item in the menu so that the user can see the form in the front end. In my case, I have added it in ‘Product Information Management’ inside Products as shown below.

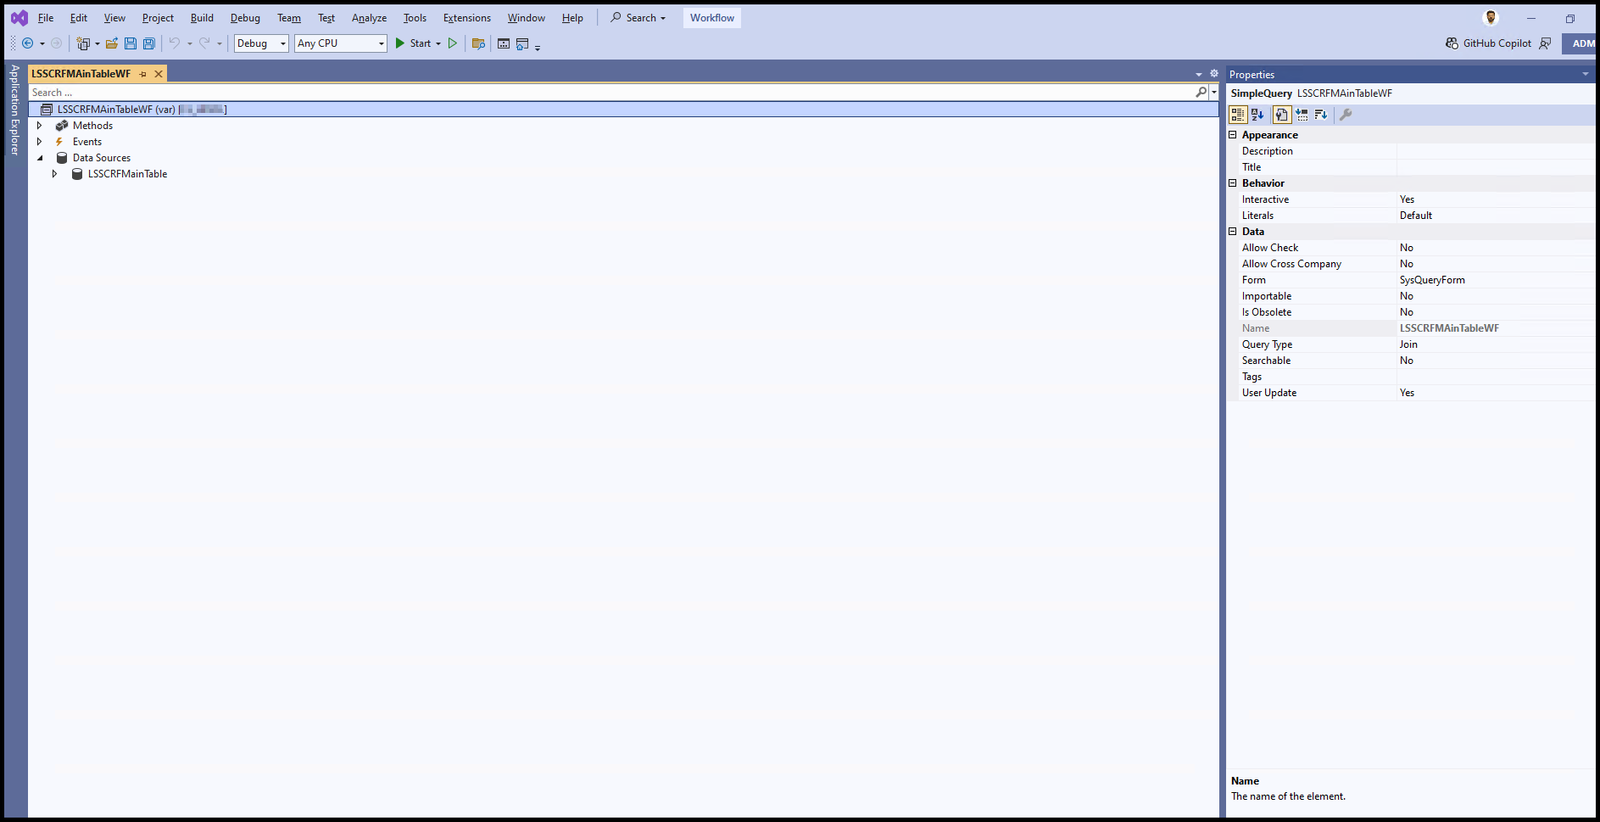
Step 8 for Workflow in Microsoft Dynamics 365 FO. Now create an AOT query and add the data source as shown below.
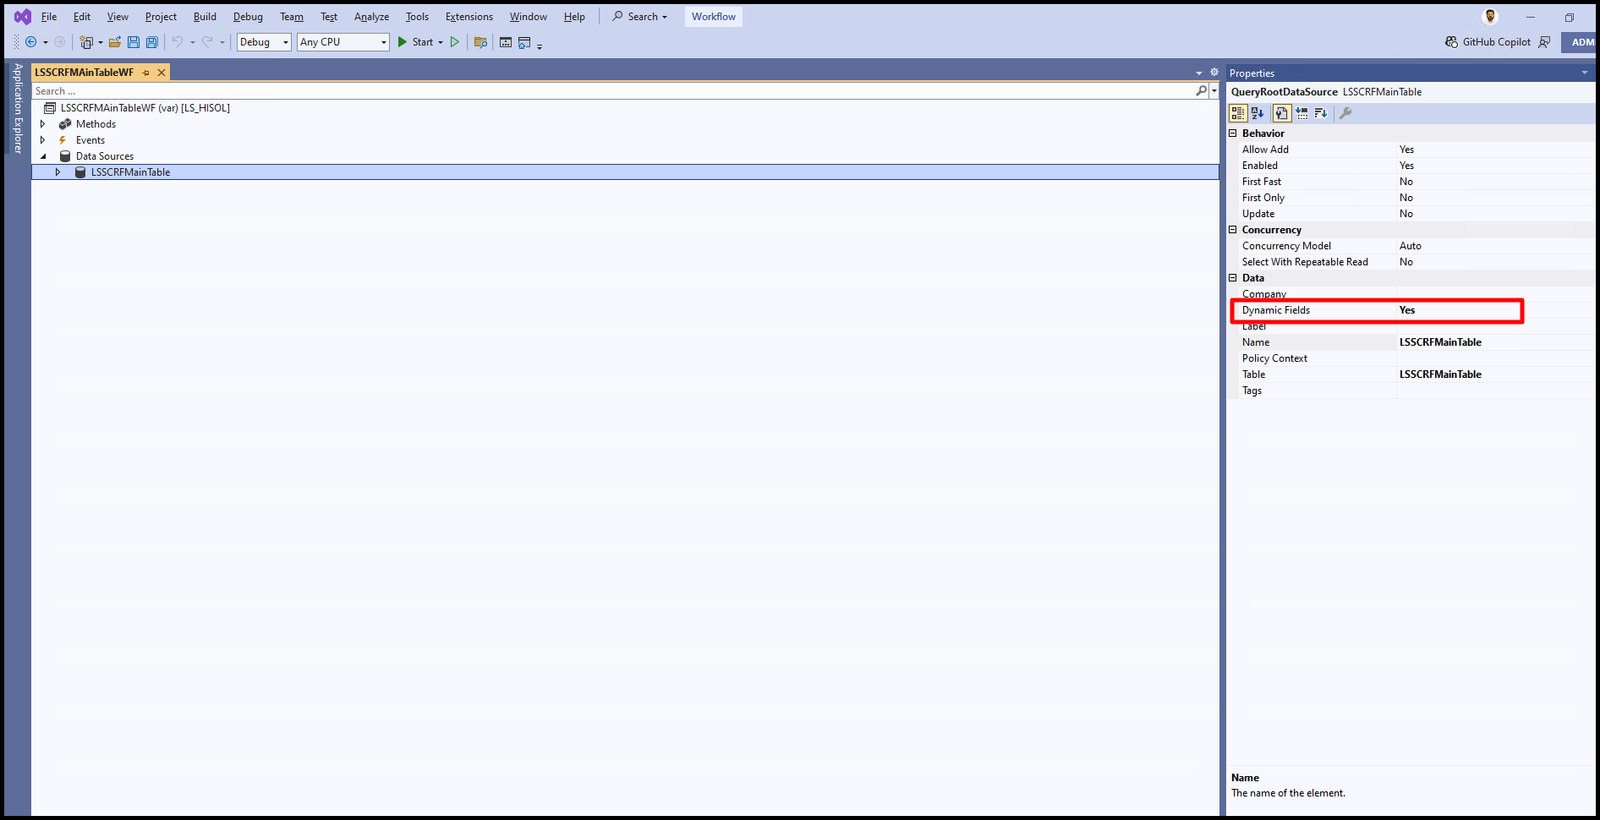
Now go to the property of Data source and set Dynamics Fields as Yes.
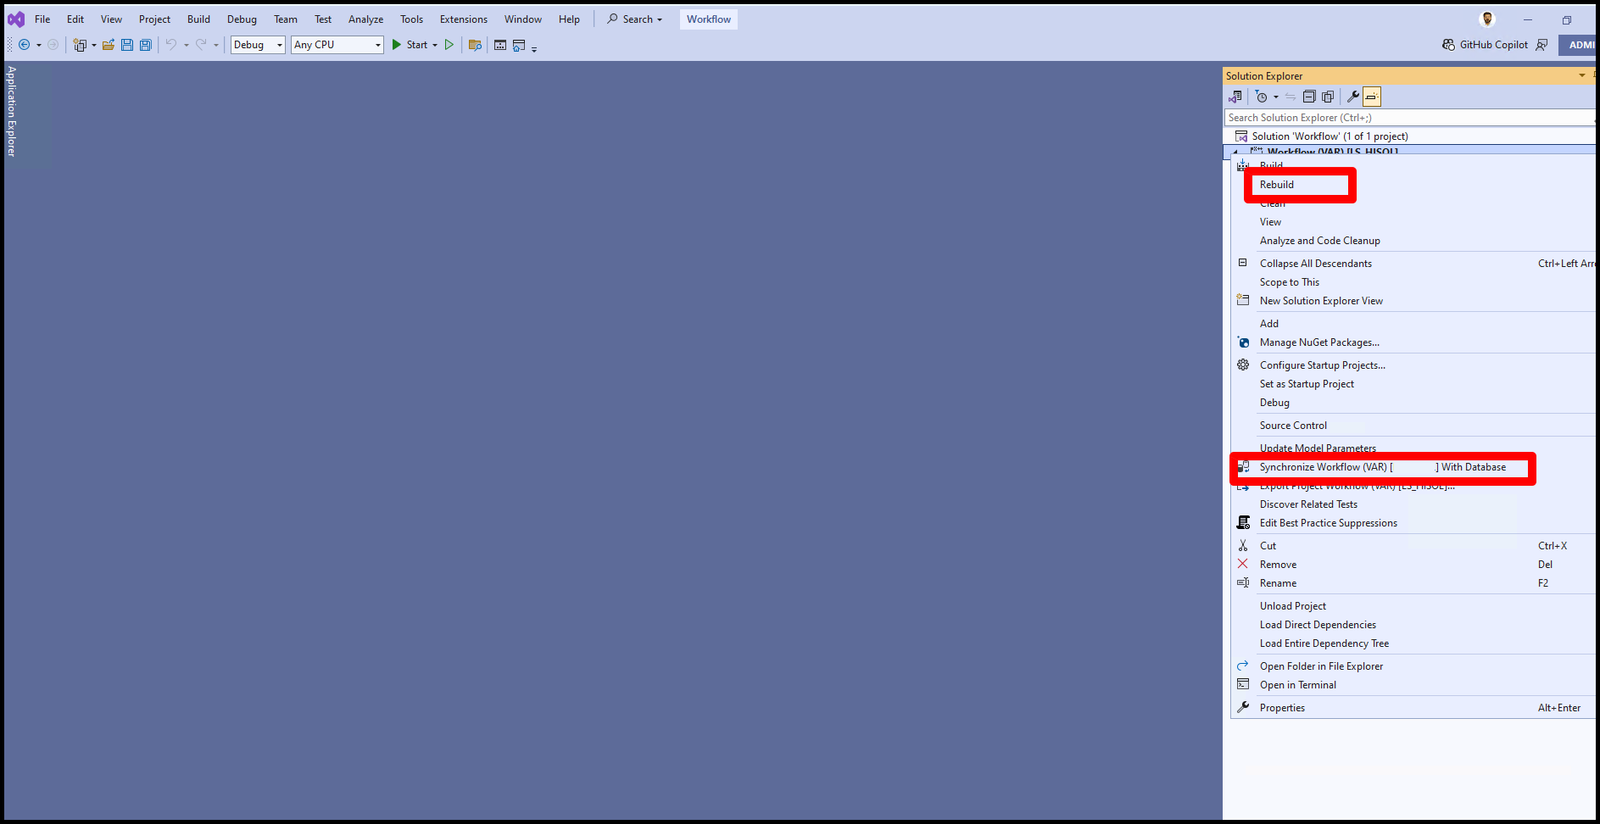
Now build and sync the project area as shown below.
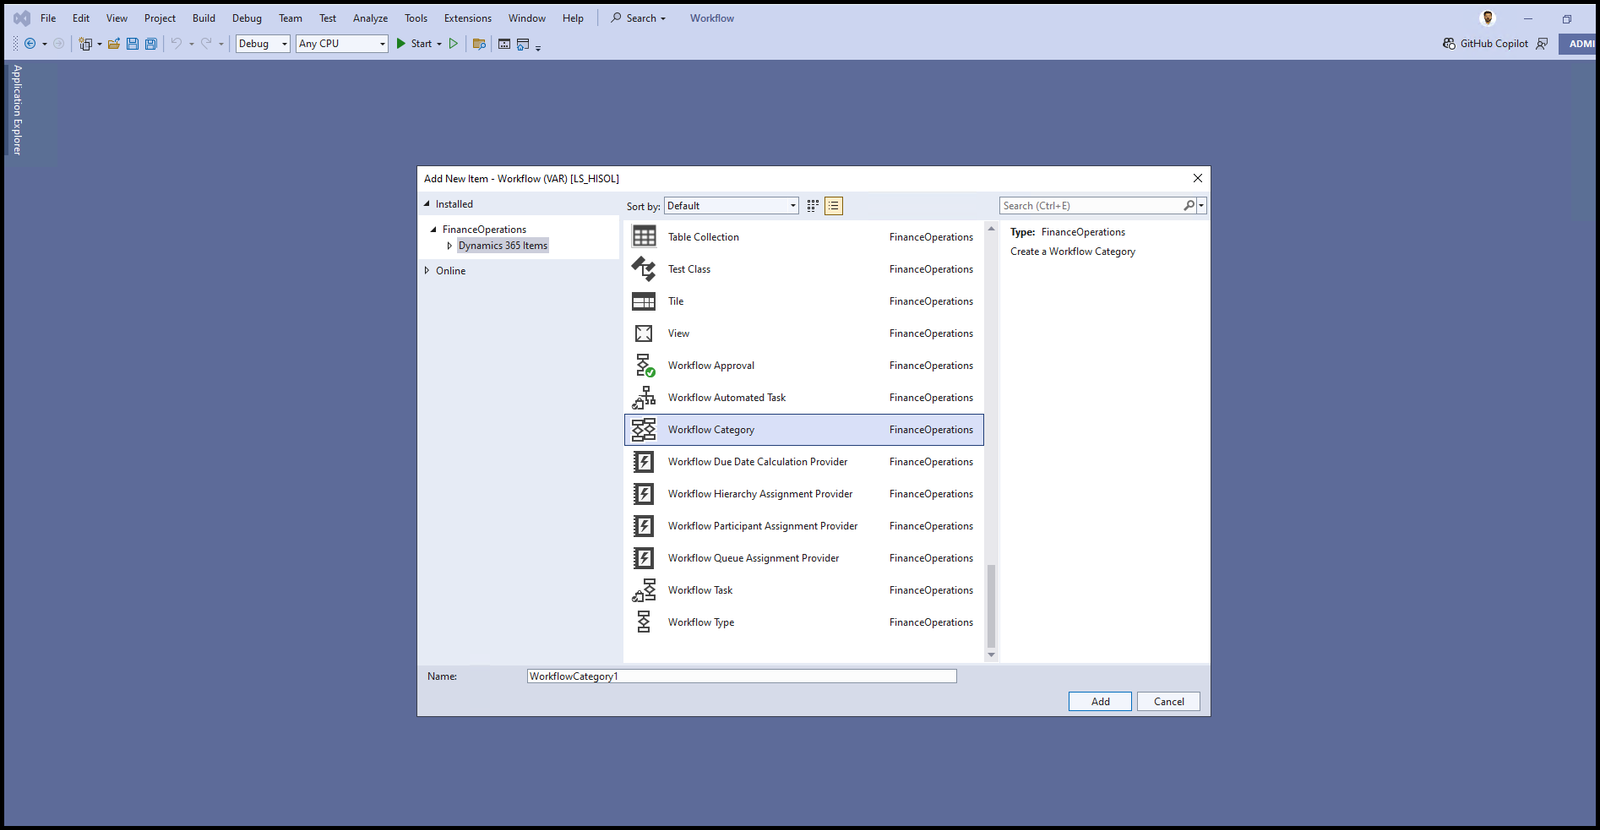
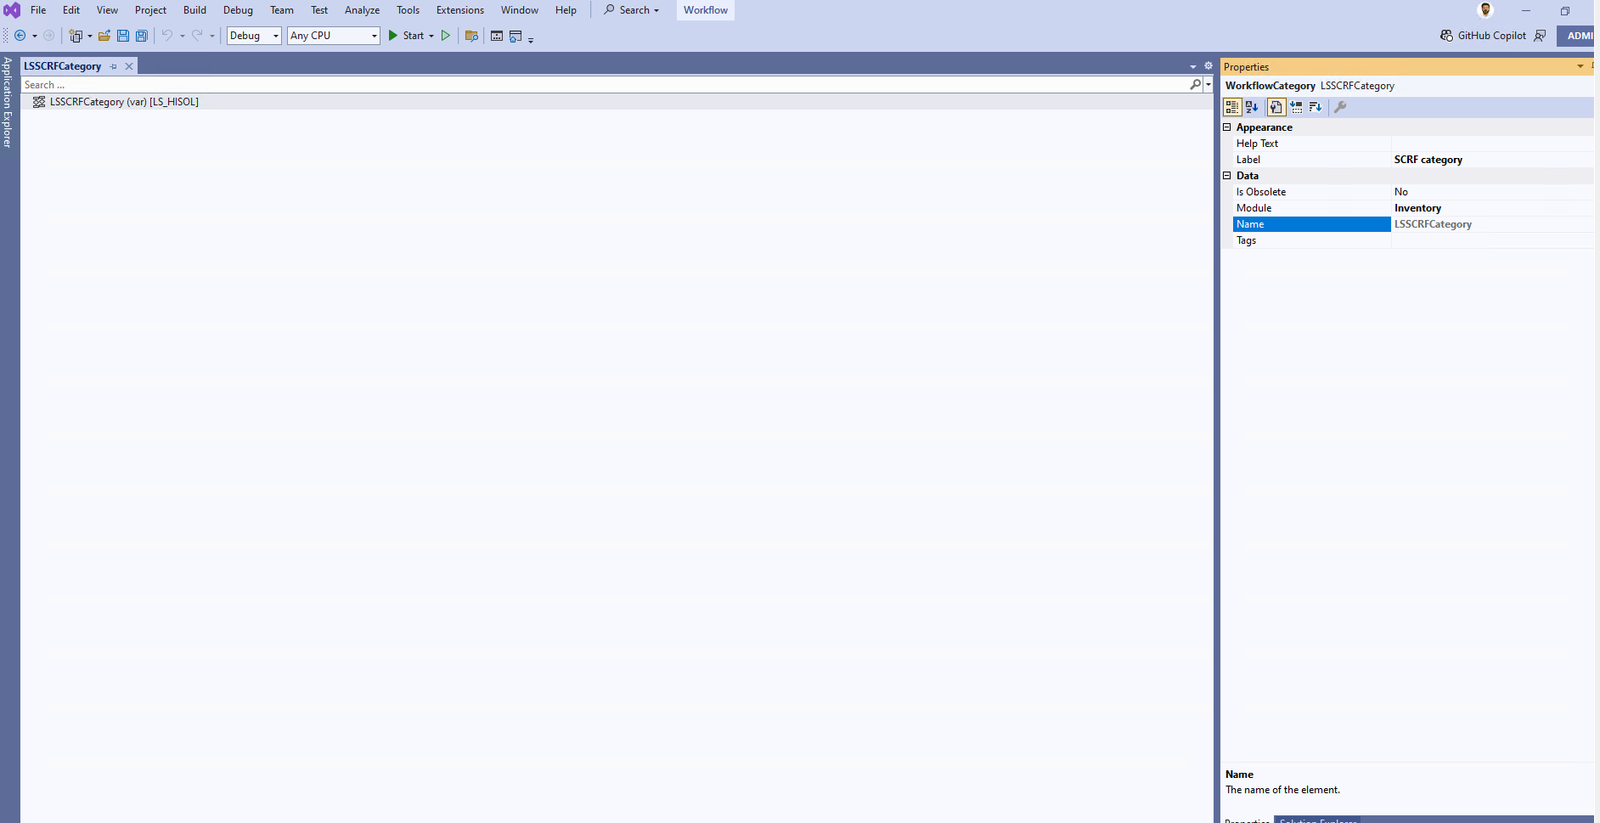
Step 9 for Workflow in Microsoft Dynamics 365 FO. Once all is completed, we will start with the Workflow Category creation. To create a workflow category we will add item from solution explorer as shown below
Now set the Label property and Module of the workflow category as shown below
Step 10 for Workflow in Microsoft Dynamics 365 FO. Now add a workflow Type. To create a workflow type we will add item from Solution Explorer as shown below
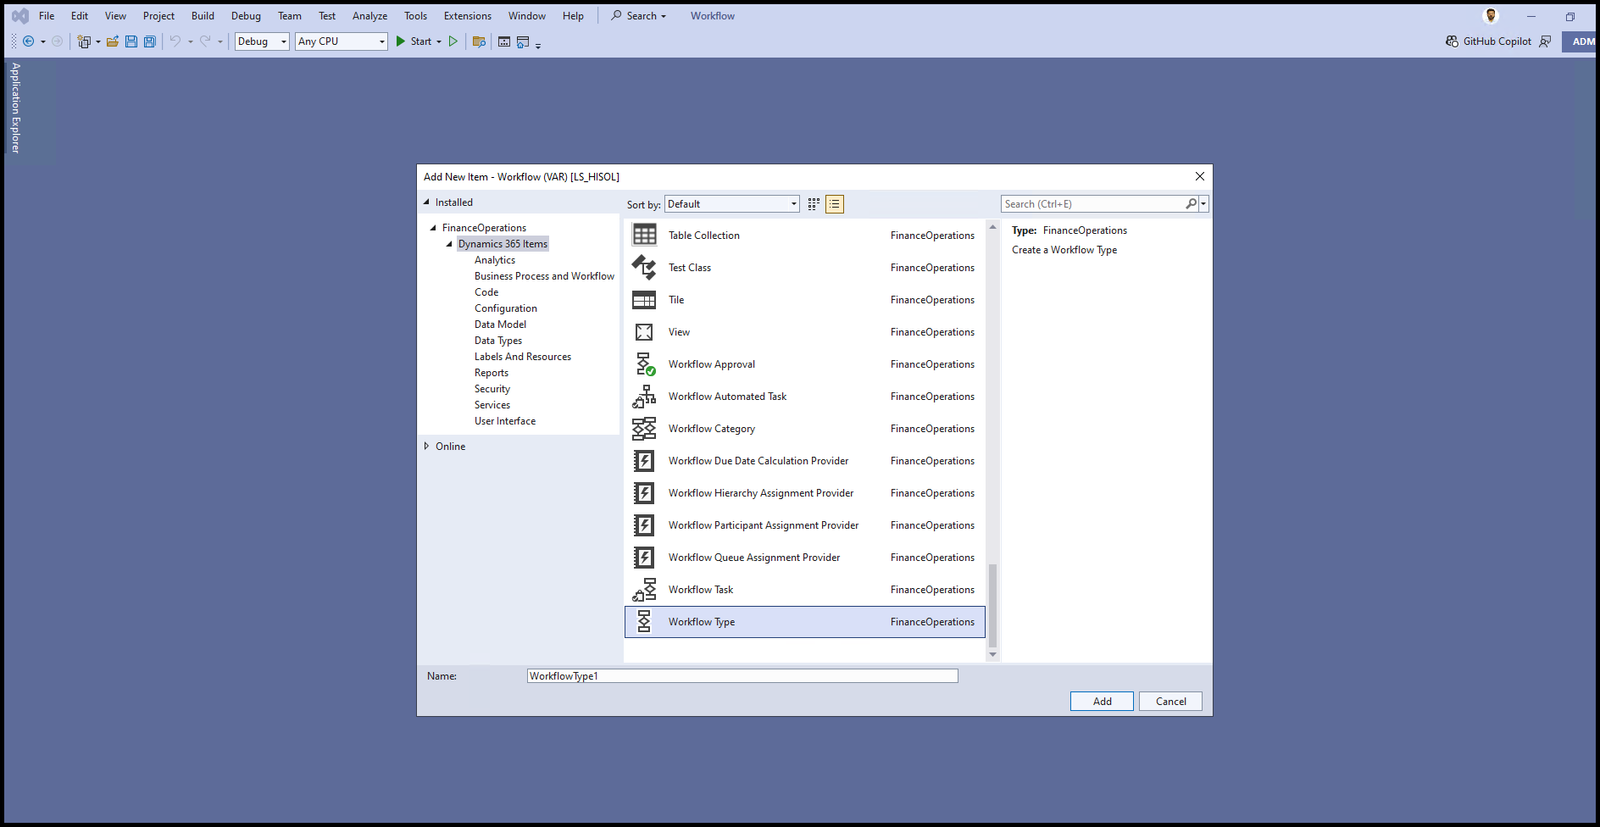
Once you click ok a new window will open like below, just select your category, query and Document menu item. These items were created in the previous steps. In my case
Category: LSSCRFCategory
Query: LSSCRFMAinTableWF
Document menu item: LSSCRFMainTable
Once this is created, it will create 3 classes and 2 action menu items. In my case, Classes were as follows:
Class 1: LSSCRFWFTypeEventHandler
Now in Class 1 LSSCRFWFTypeEventHandler should be updated as below
/// <summary>
/// The LSSCRFWFTypeEventHandler workflow event handler.
/// </summary>
public class  LSSCRFWFTypeEventHandler implements WorkflowCanceledEventHandler,
	WorkflowCompletedEventHandler,
	WorkflowStartedEventHandler
{
    public void started(WorkflowEventArgs _workflowEventArgs)
	{
        LSSCRFMainTable::updateWorkflowStatus(_workflowEventArgs.parmWorkflowContext().parmRecId(), LSSCRFWorkflowStatus::InReview);
	}

    public void canceled(WorkflowEventArgs _workflowEventArgs)
	{
        LSSCRFMainTable::updateWorkflowStatus(_workflowEventArgs.parmWorkflowContext().parmRecId(), LSSCRFWorkflowStatus::Draft);
	}

    public void completed(WorkflowEventArgs _workflowEventArgs)
	{
        LSSCRFMainTable::updateWorkflowStatus(_workflowEventArgs.parmWorkflowContext().parmRecId(), LSSCRFWorkflowStatus::Approved);
	}

}
Class 2: LSSCRFWFTypeSubmitManager
Now in Class 2 LSSCRFWFTypeSubmitManager should be updated as below
/// <summary>
/// The LSSCRFWFTypeSubmitManager menu item action event handler.
/// </summary>
public class LSSCRFWFTypeSubmitManager
{
    public static void main(Args args)
	{
        #Define.Blank('')
        LSSCRFMainTable         mainTable;
        WorkflowComment         note = #blank;
        WorkflowSubmitDialog    workflowSubmitDialog;
        WorkflowCorrelationId   workflowCorrelationId;
        WorkflowTypeName        workflowTypeName = workFlowTypeStr('LSSCRFWFType');

        mainTable = args.record();

        //Opens the submit to workflow dialog.
        workflowSubmitDialog = WorkflowSubmitDialog::construct(args.caller().getActiveWorkflowConfiguration());
        workflowSubmitDialog.run();

        if (workflowSubmitDialog.parmIsClosedOK())
        {
            // Get comments from the submit to workflow dialog.
            note = workflowSubmitDialog.parmWorkflowComment();
            try
            {
                ttsbegin;

                workflowCorrelationId = Workflow::activateFromWorkflowType(workflowTypeName, mainTable.RecId, note, NoYes::No);
                mainTable.SCRFWorkflowStatus    = LSSCRFWorkflowStatus::InReview;
                mainTable.SubmittedBy           = curUserId();
                mainTable.SubmittedDate         = DateTimeUtil::getToday(DateTimeUtil::getUserPreferredTimeZone());
                mainTable.update();

                ttscommit;
                info('Submitted to workflow.');
            }
            catch (Exception::Error)
            {
                throw error('Error on workflow activation.');
            }
        }

        args.caller().updateWorkFlowControls();
	}

}
Class 3: LSSCRFWFTypeDocument
Now in Class 3 LSSCRFWFTypeDocument should be updated as below
/// <summary>
/// The LSSCRFWFTypeDocument workflow document class.
/// </summary>
class LSSCRFWFTypeDocument extends WorkflowDocument
{
/// <summary>
/// Returns query name for the workflow document.
/// </summary>
/// <returns>
/// Name of the query <c>LSSCRFMAinTableWF</c>.
/// </returns>
public queryName getQueryName()
{
return querystr(LSSCRFMainTableWF);
}
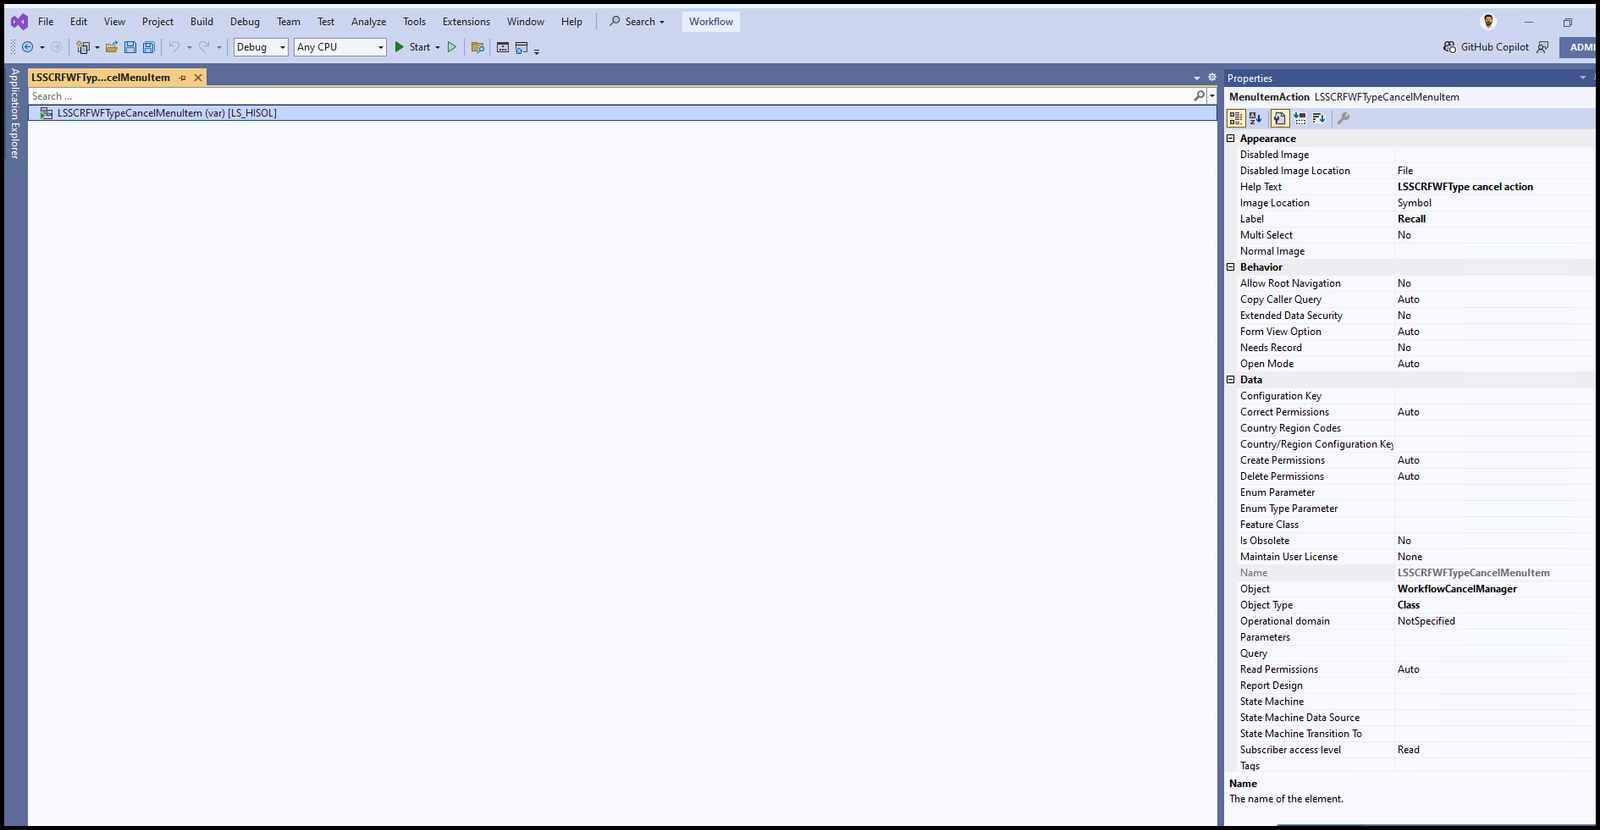
}Action menu item 1: LSSCRFWFTypeCancelMenuItem
Now in Action menu item 1 LSSCRFWFTypeCancelMenuItem should be updated as below. Set the label to ‘Recall’.
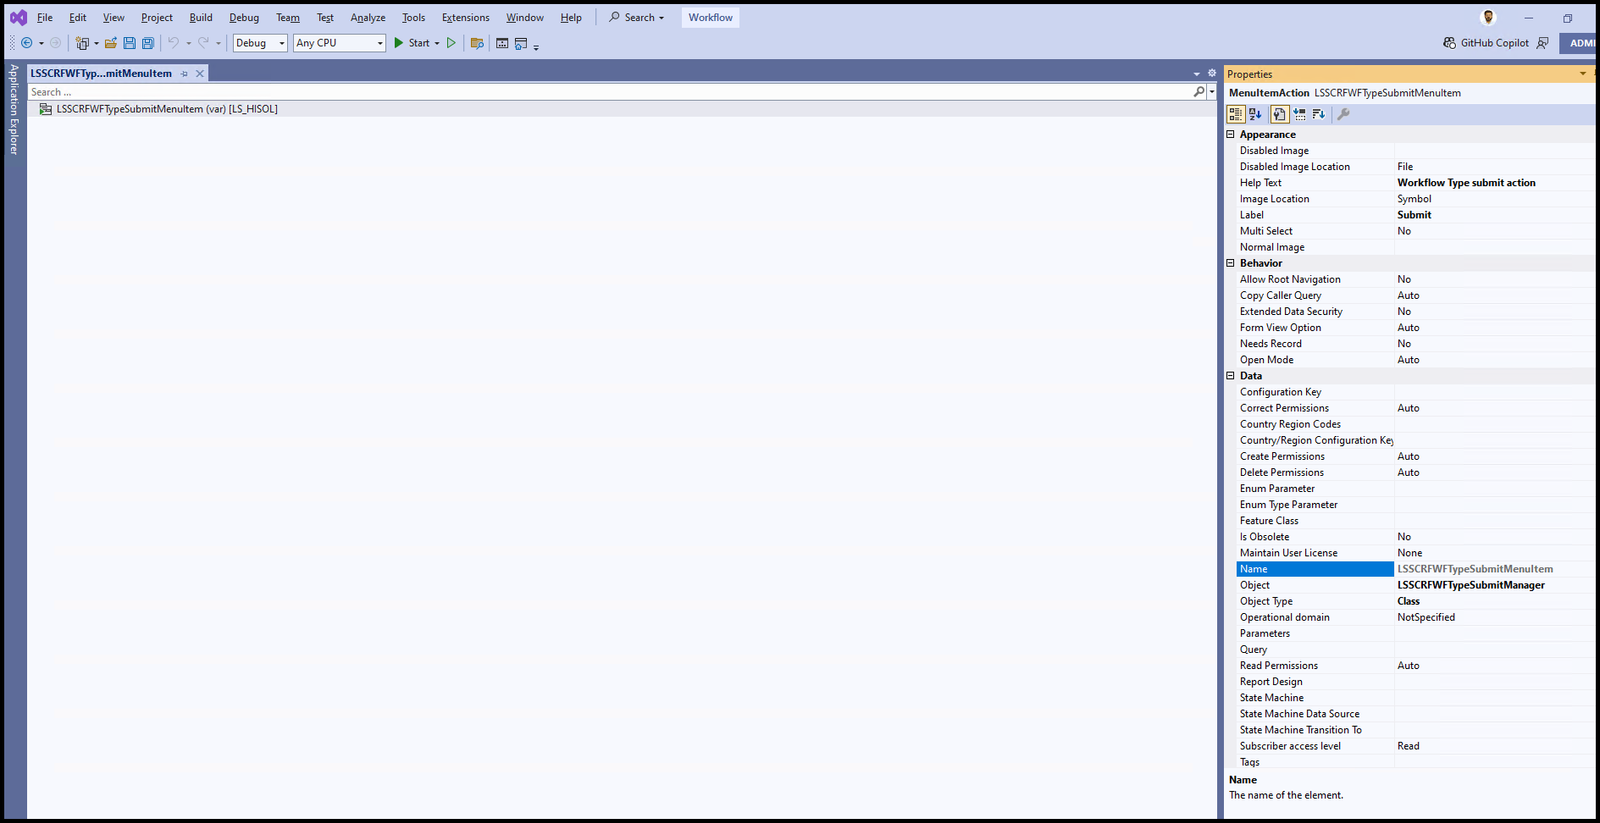
Action menu item 2: LSSCRFWFTypeSubmitMenuItem
Now in Action menu item 2 LSSCRFWFTypeSubmitMenuItem should be updated as below. Set the label to ‘Submit’.
Once all the above is done, do a build and sync of the project.
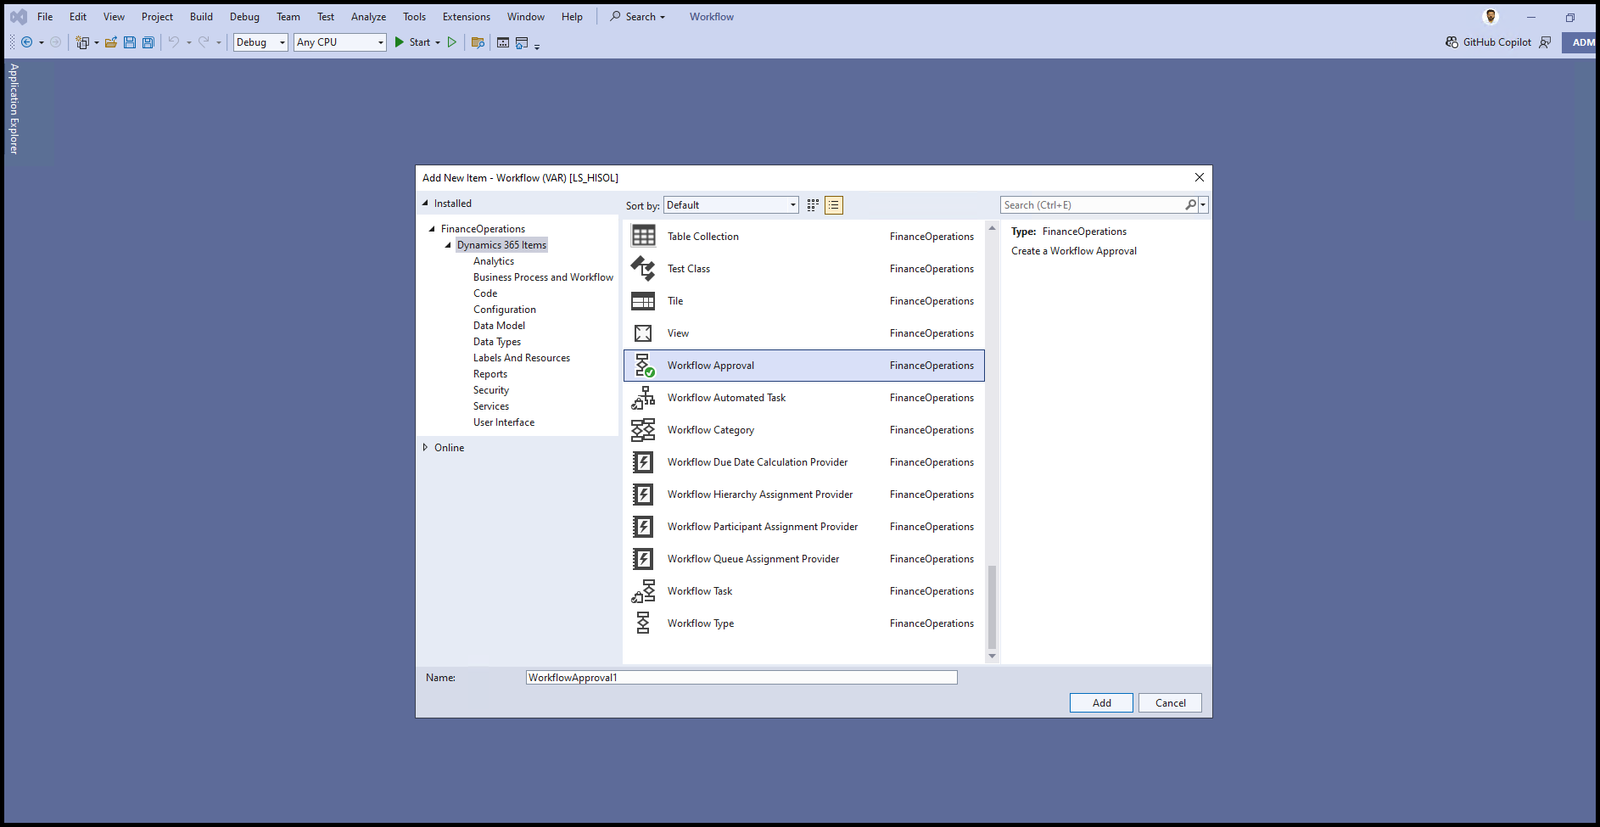
Step 11 for Workflow in Microsoft Dynamics 365 FO. Now we will create workflow approval, To create a workflow approval we will add an item from Solution Explorer as shown below
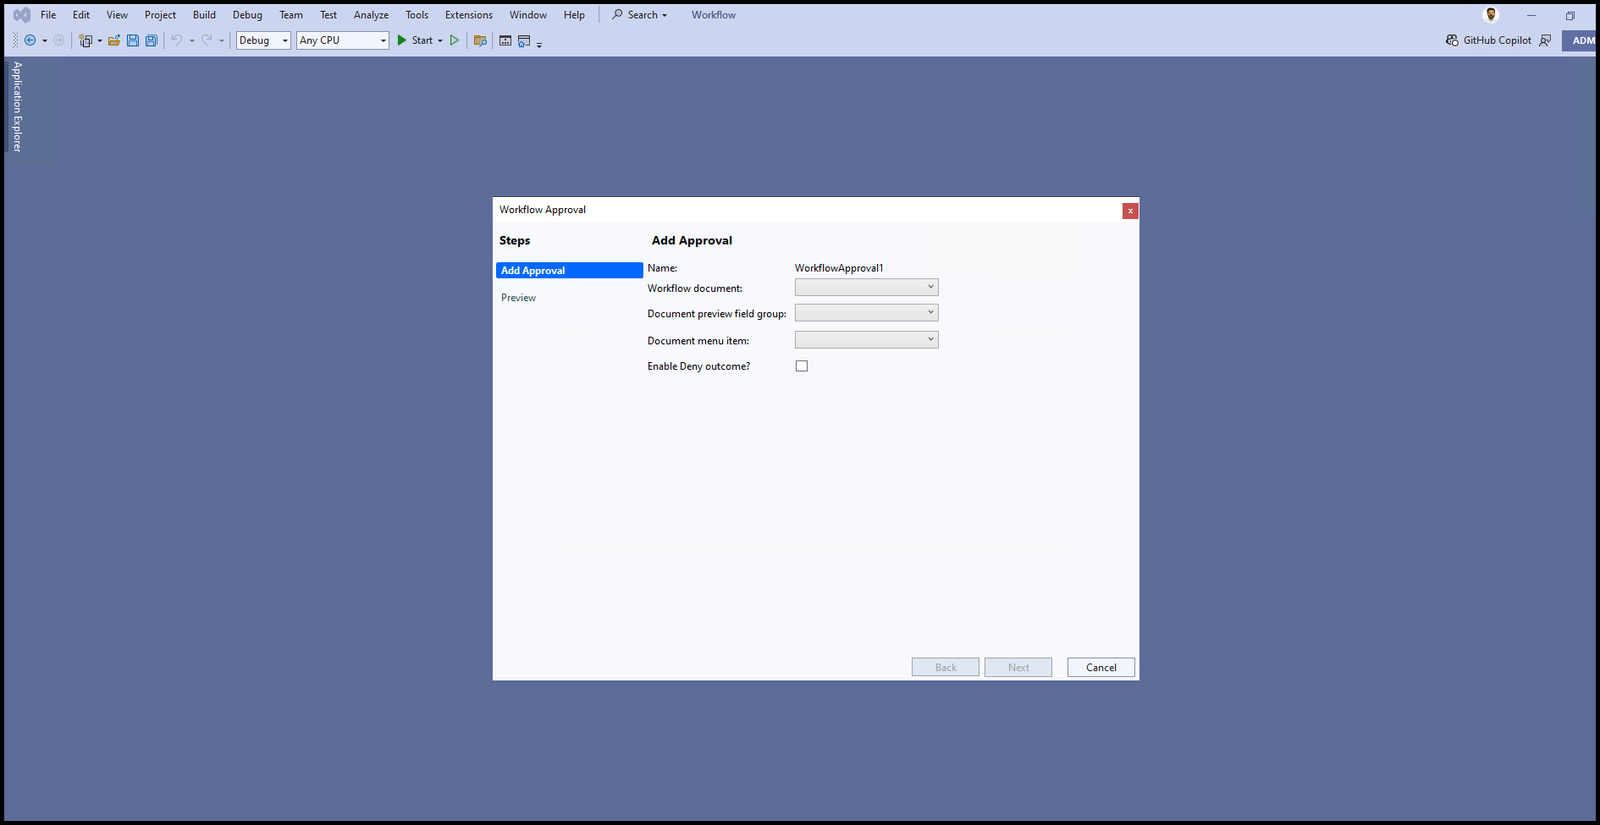
Once you click next a new dialog box will open like below, fill in the details as shown below
Workflow document: This was that class that was automatically created while creating workflow type, in my case LSSCRFWFTypeDocument.
Document menu item: Menu item for the form that we created, in my case LSSCRFMainTable.
Now once you click on next and finish, 2 classes and 5 menu items will be automatically created in your project area.
Class 1: LSSCRFWFApprovalEventHandler
Now in Class 1 LSSCRFWFApprovalEventHandler should be updated as below
/// <summary>
/// The LSSCRFWFApprovalEventHandler workflow outcome event handler.
/// </summary>
public final class LSSCRFWFApprovalEventHandler implements WorkflowElementCanceledEventHandler,
WorkflowElemChangeRequestedEventHandler,
WorkflowElementCompletedEventHandler,
WorkflowElementReturnedEventHandler,
WorkflowElementStartedEventHandler,
WorkflowElementDeniedEventHandler,
WorkflowWorkItemsCreatedEventHandler
{
public void started(WorkflowElementEventArgs _workflowElementEventArgs)
{
LSSCRFMainTable::updateWorkflowStatus(_workflowElementEventArgs.parmWorkflowContext().parmRecId(), LSSCRFWorkflowStatus::InReview);
}
public void canceled(WorkflowElementEventArgs _workflowElementEventArgs)
{
LSSCRFMainTable::updateWorkflowStatus(_workflowElementEventArgs.parmWorkflowContext().parmRecId(), LSSCRFWorkflowStatus::Draft);
}
public void completed(WorkflowElementEventArgs _workflowElementEventArgs)
{
LSSCRFMainTable::updateWorkflowStatus(_workflowElementEventArgs.parmWorkflowContext().parmRecId(), LSSCRFWorkflowStatus::Approved);
}
public void denied(WorkflowElementEventArgs _workflowElementEventArgs)
{
LSSCRFMainTable::updateWorkflowStatus(_workflowElementEventArgs.parmWorkflowContext().parmRecId(), LSSCRFWorkflowStatus::Draft);
}
public void changeRequested(WorkflowElementEventArgs _workflowElementEventArgs)
{
LSSCRFMainTable::updateWorkflowStatus(_workflowElementEventArgs.parmWorkflowContext().parmRecId(), LSSCRFWorkflowStatus::Draft);
}
public void returned(WorkflowElementEventArgs _workflowElementEventArgs)
{
LSSCRFMainTable::updateWorkflowStatus(_workflowElementEventArgs.parmWorkflowContext().parmRecId(), LSSCRFWorkflowStatus::Rejected);
}
public void created(WorkflowWorkItemsEventArgs _workflowWorkItemsEventArgs)
{
LSSCRFMainTable::updateWorkflowStatus(_workflowWorkItemsEventArgs.parmWorkflowElementEventArgs().parmWorkflowContext().parmRecId(), LSSCRFWorkflowStatus::InReview);
}
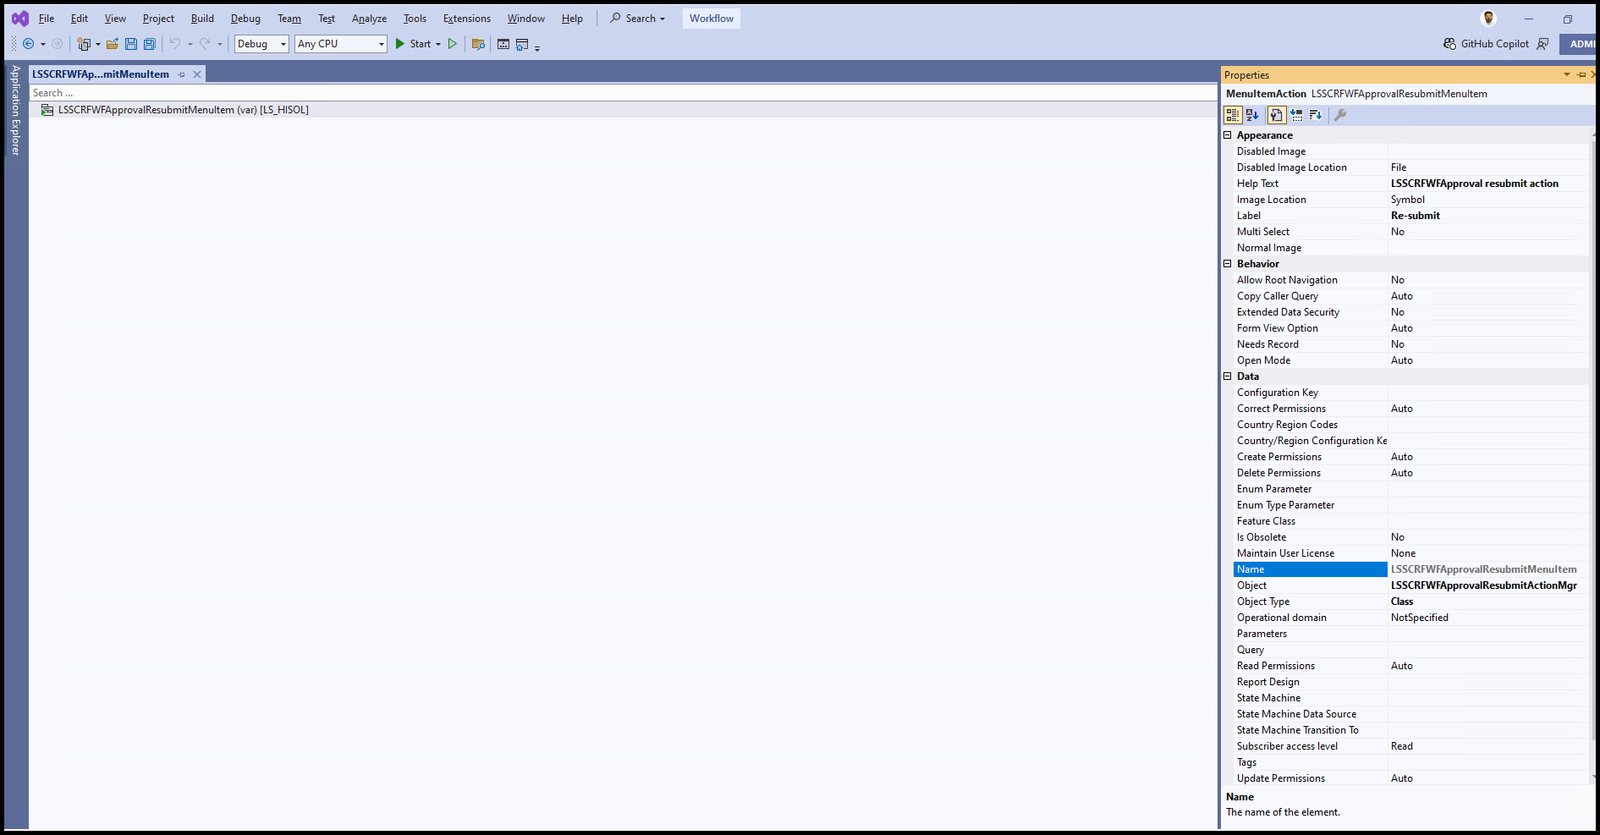
}Class 1: LSSCRFWFApprovalResubmitActionMgr
Now in Class 1 LSSCRFWFApprovalResubmitActionMgr we don’t need to update anything
/// <summary>
/// The LSSCRFWFApprovalResubmitActionMgr menu item action event handler.
/// </summary>
public class LSSCRFWFApprovalResubmitActionMgr
{
public static void main(Args args)
{
// TODO: Write code to execute once work items are resubmitted.
}
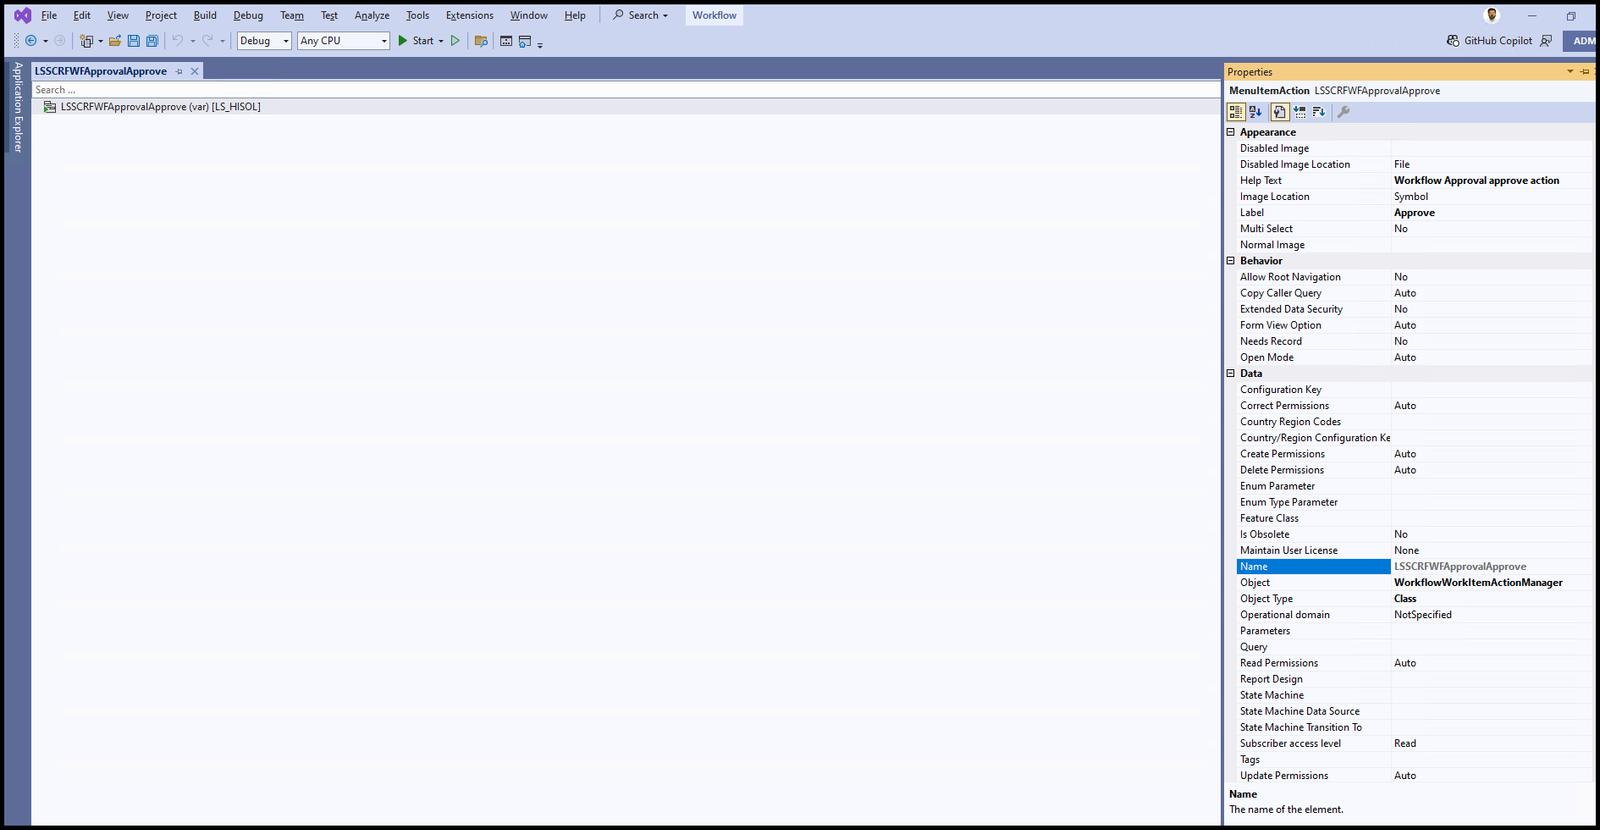
}Action menu item 1: LSSCRFWFApprovalApprove
Update the property of the action menu item as shown below
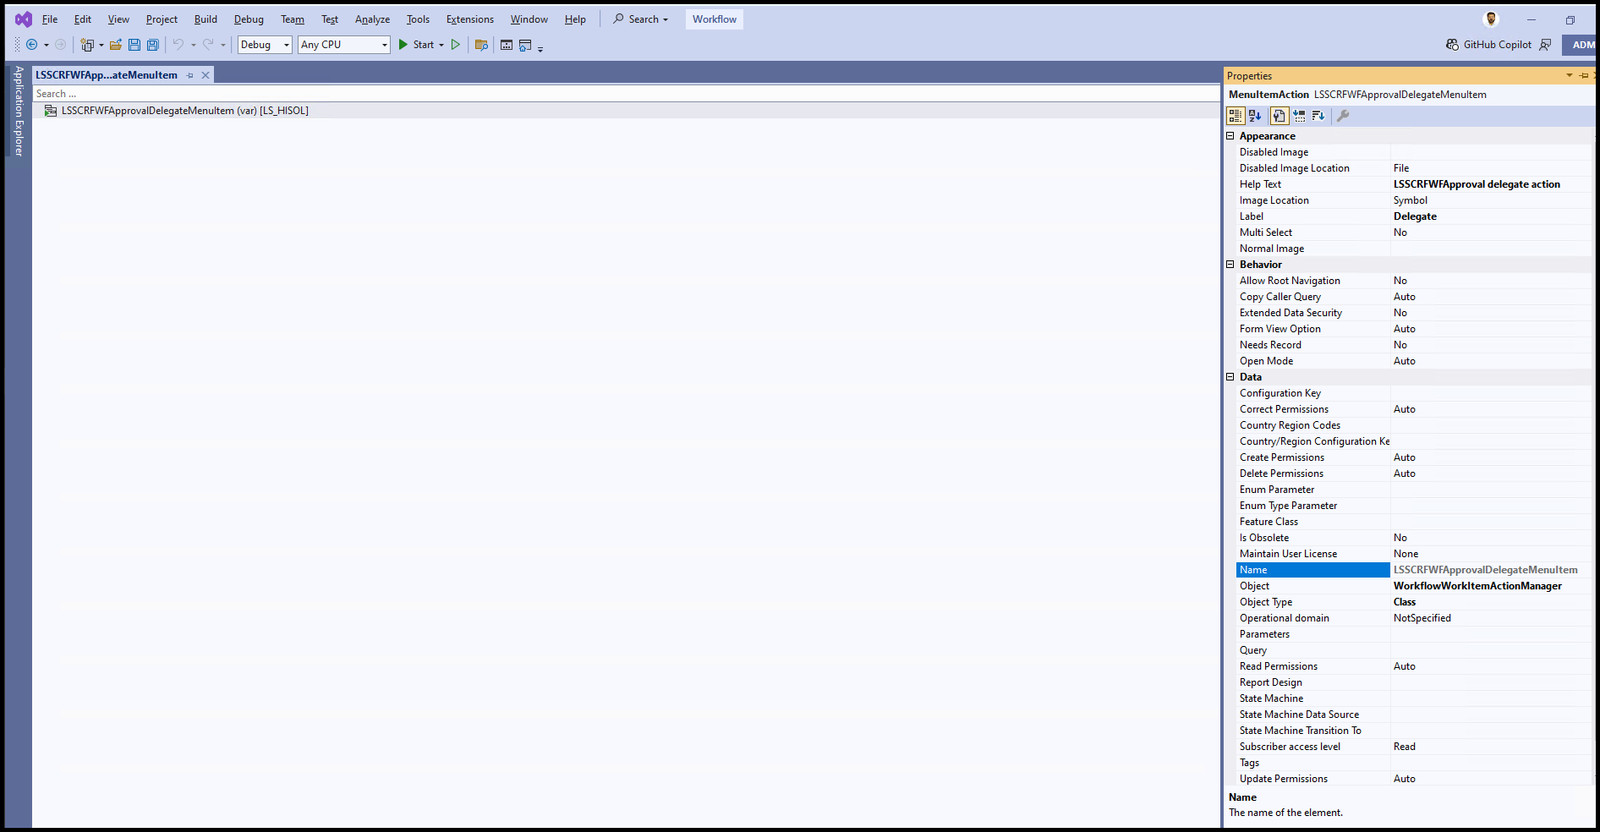
Action menu item 2: LSSCRFWFApprovalDelegateMenuItem
Update the property of the action menu item as shown below
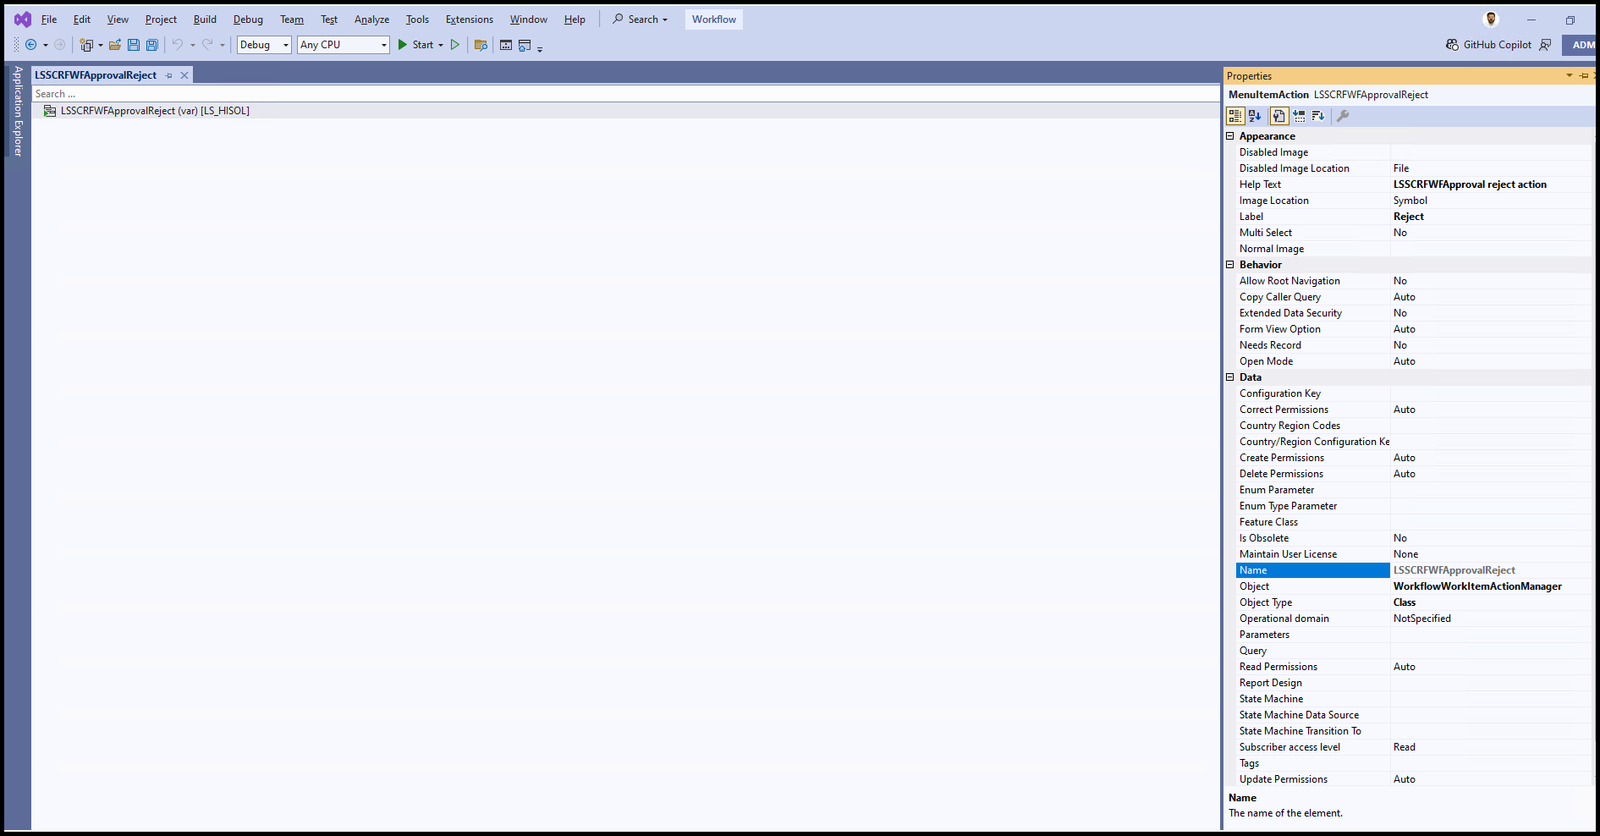
Action menu item 3: LSSCRFWFApprovalReject
Update the property of the action menu item as shown below
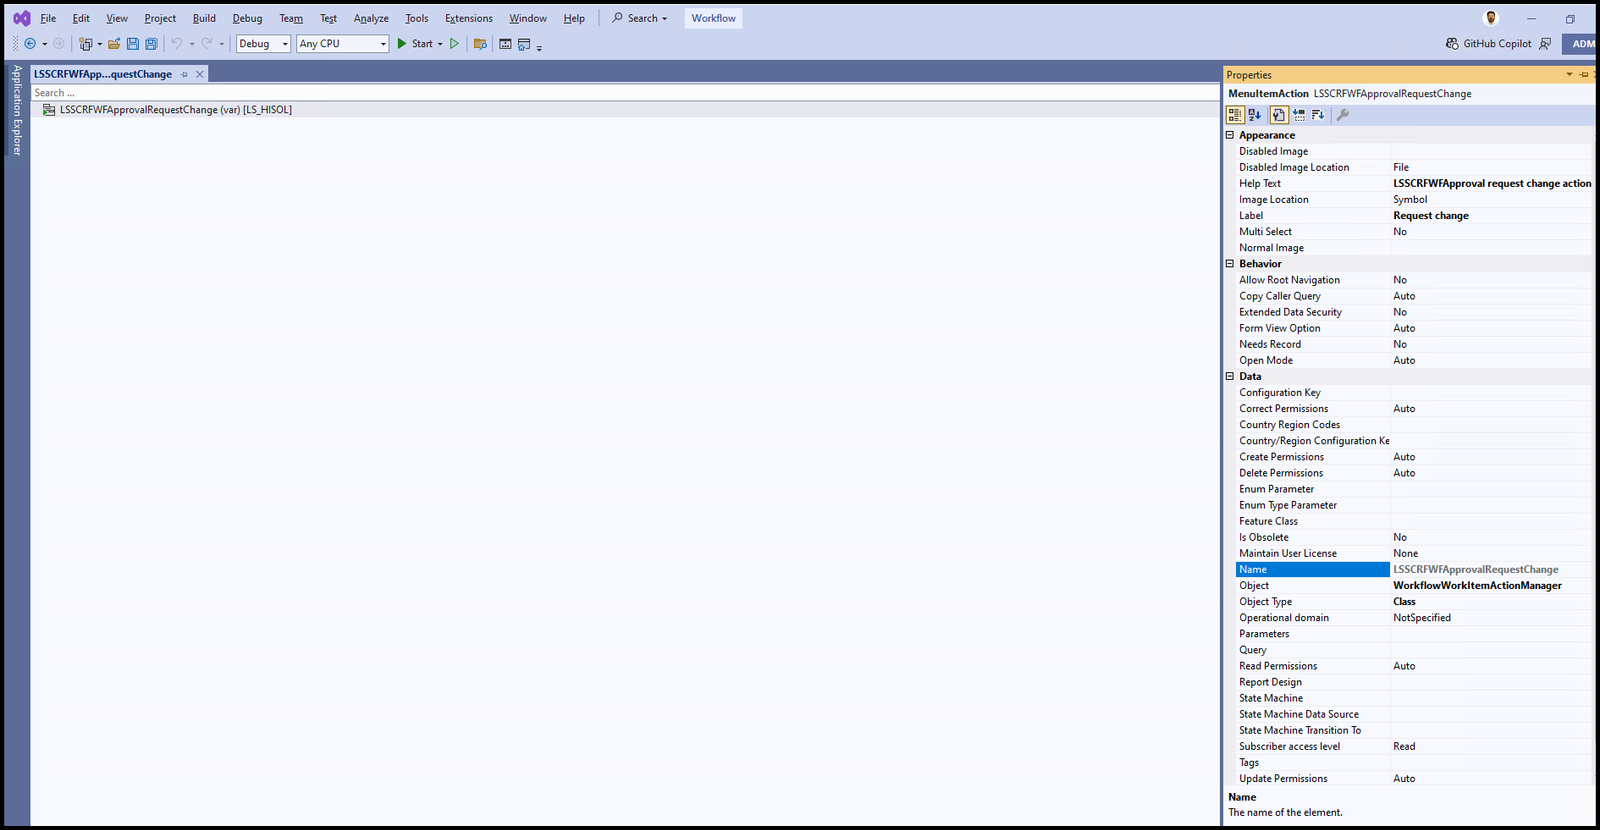
Action menu item 4: LSSCRFWFApprovalRequestChange
Update the property of the action menu item as shown below
Action menu item 5: LSSCRFWFApprovalDelegateMenuItem
Update the property of the action menu item as shown below
Now do a build and synchronisation of the project area.
Step 12 for Workflow in Microsoft Dynamics 365 FO. Now open the Workflow type and add the workflow approval reference in the supported elements as shown below.
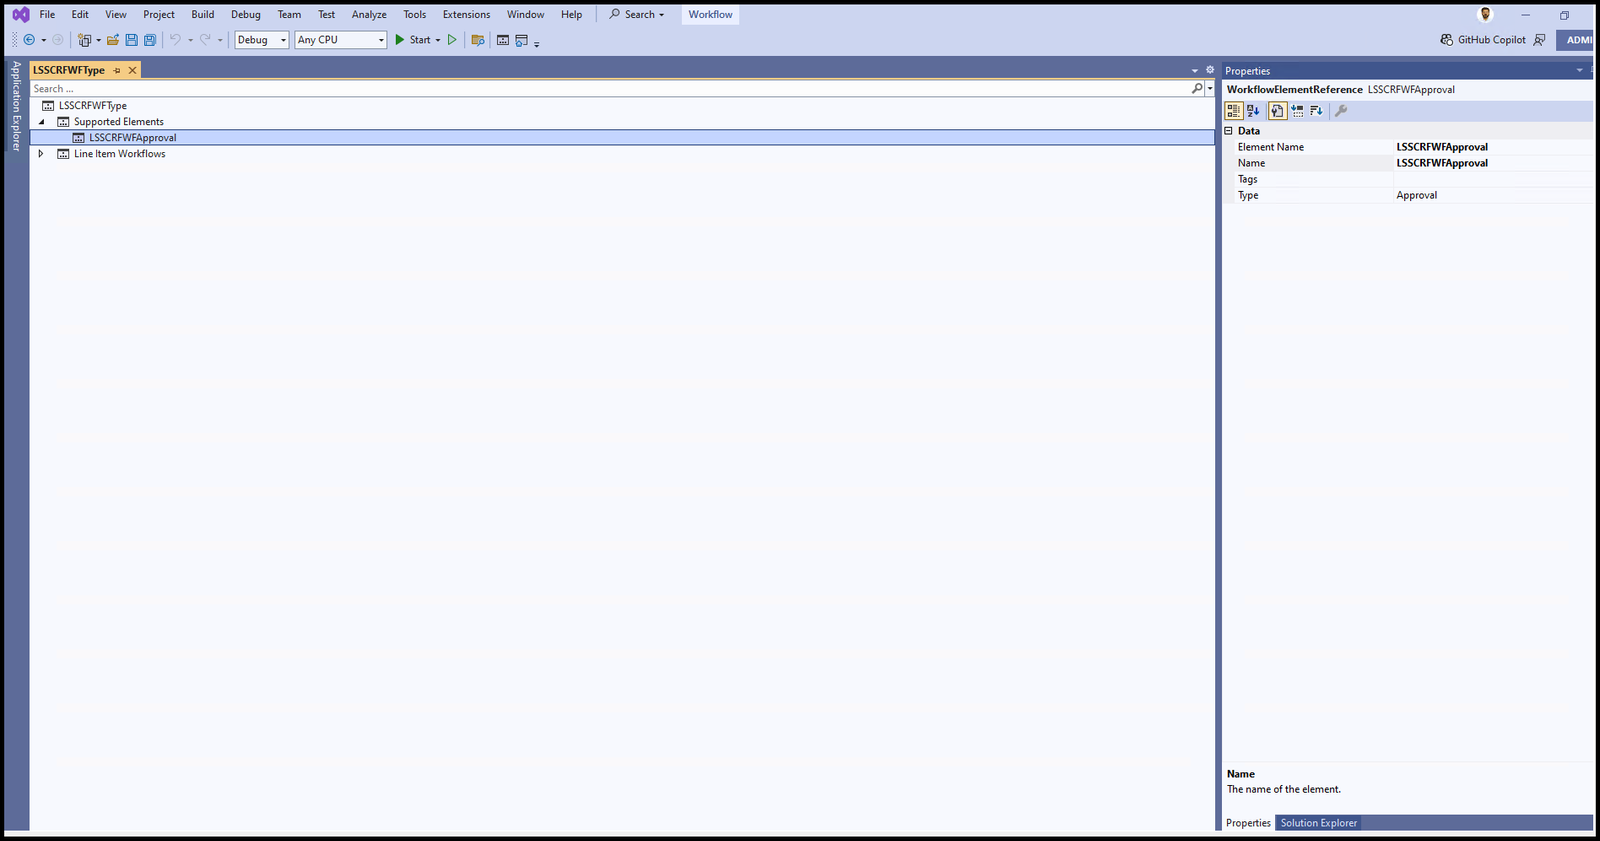
Now for workflow type property should look as below (Just update the label for workflow type)
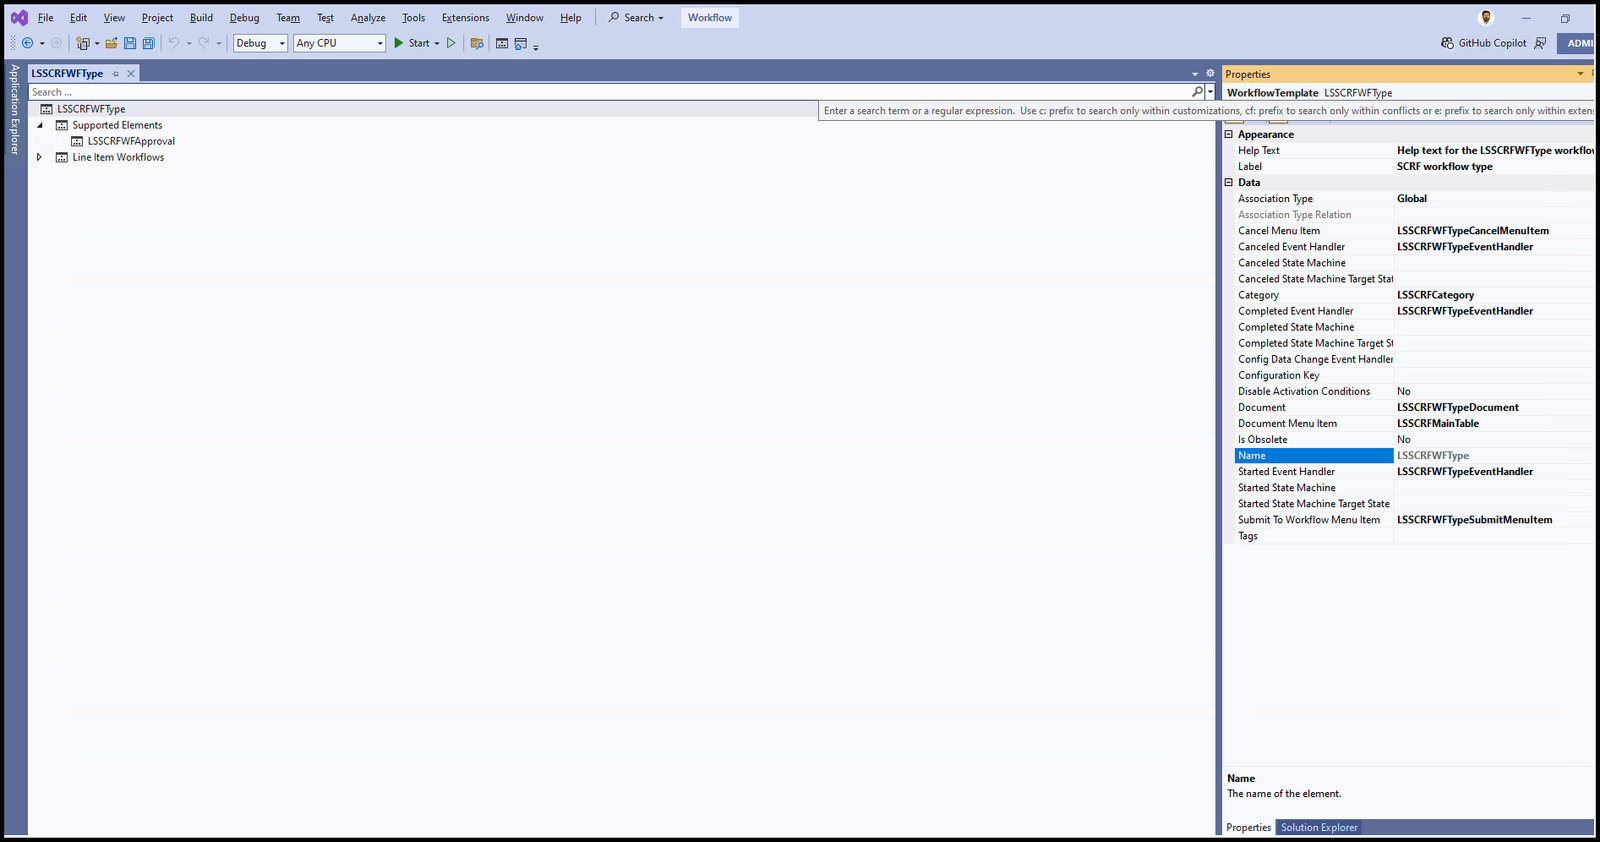
Once all this is done, open the form on which you want to apply the workflow
Step 13 for Workflow in Microsoft Dynamics 365 FO. Go to form design set the workflow data source, enable the workflow, and set the workflow type. In my case, it is as follows
Workflow data source: LSSCRFMainTable
Workflow enabled: Yes
Workflow type: LSSCRFWFType
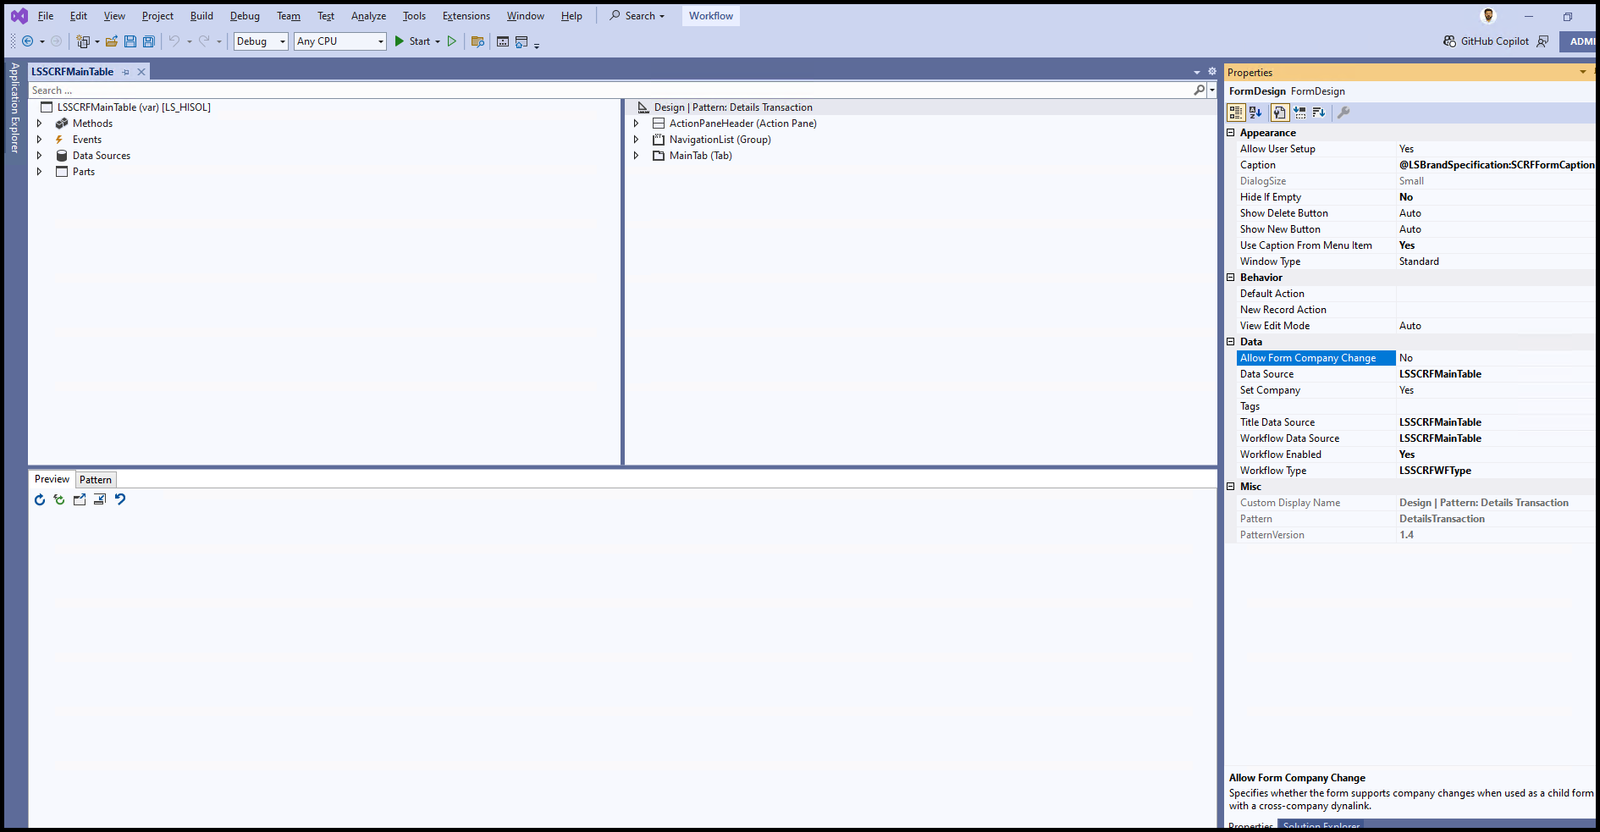
Once all this is done, just build and synchronize your project area and we are good to go for front-end configuration.
Front-End configuration of workflow in Microsoft Dynamics 365 FO:
Now for the front-end configuration of the workflow for Workflow in Microsoft Dynamics 365 FO, go to the module for which you created the workflow, in my case ‘Product Information Management’ module.
Path for workflow form:
Product Information Management> Setup > Product Information and management workflow
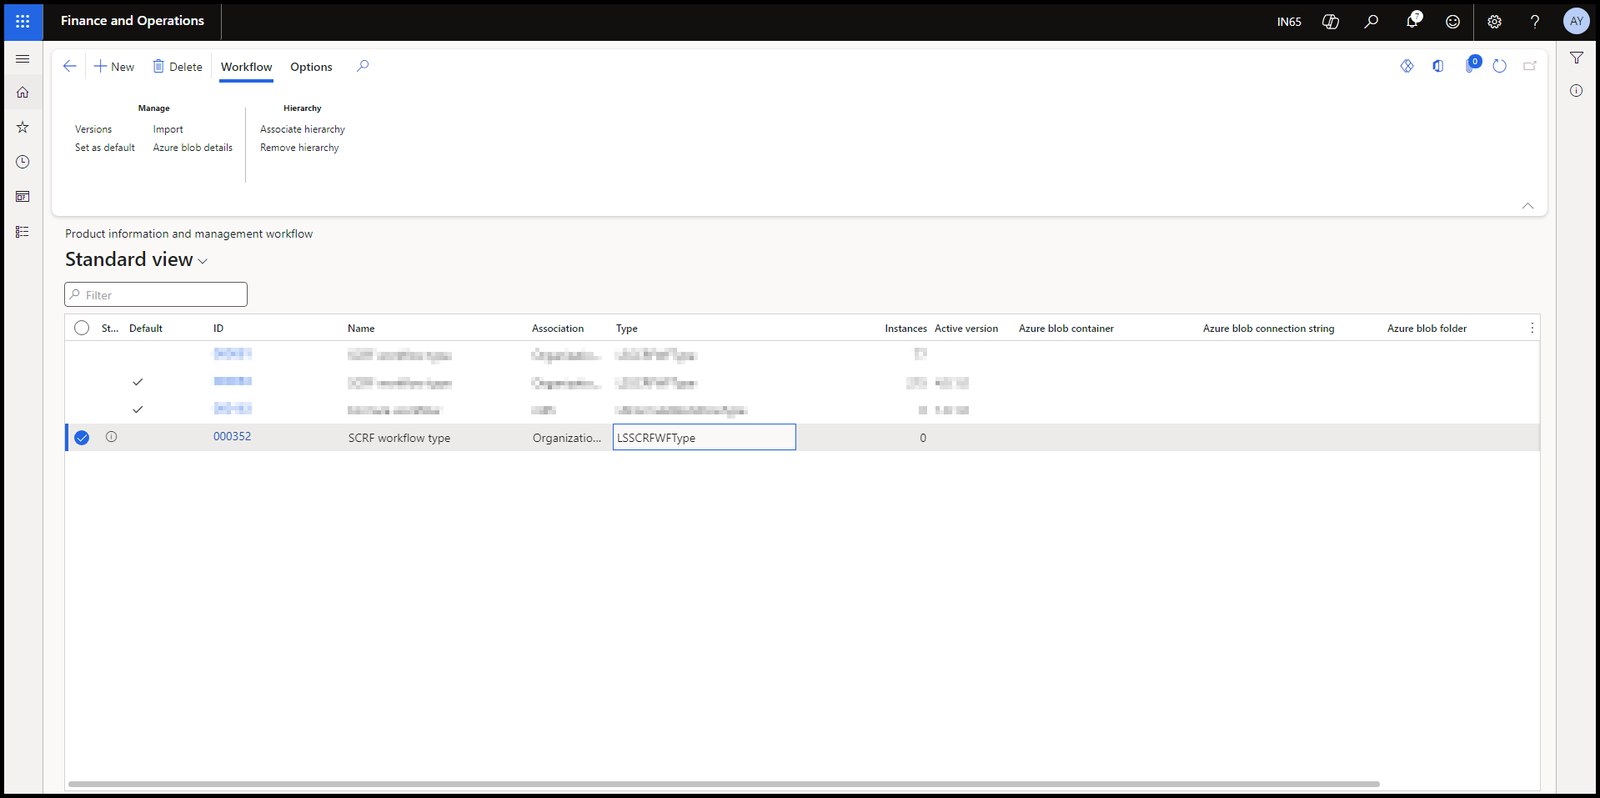
You will see the workflows of that module in this form as shown below
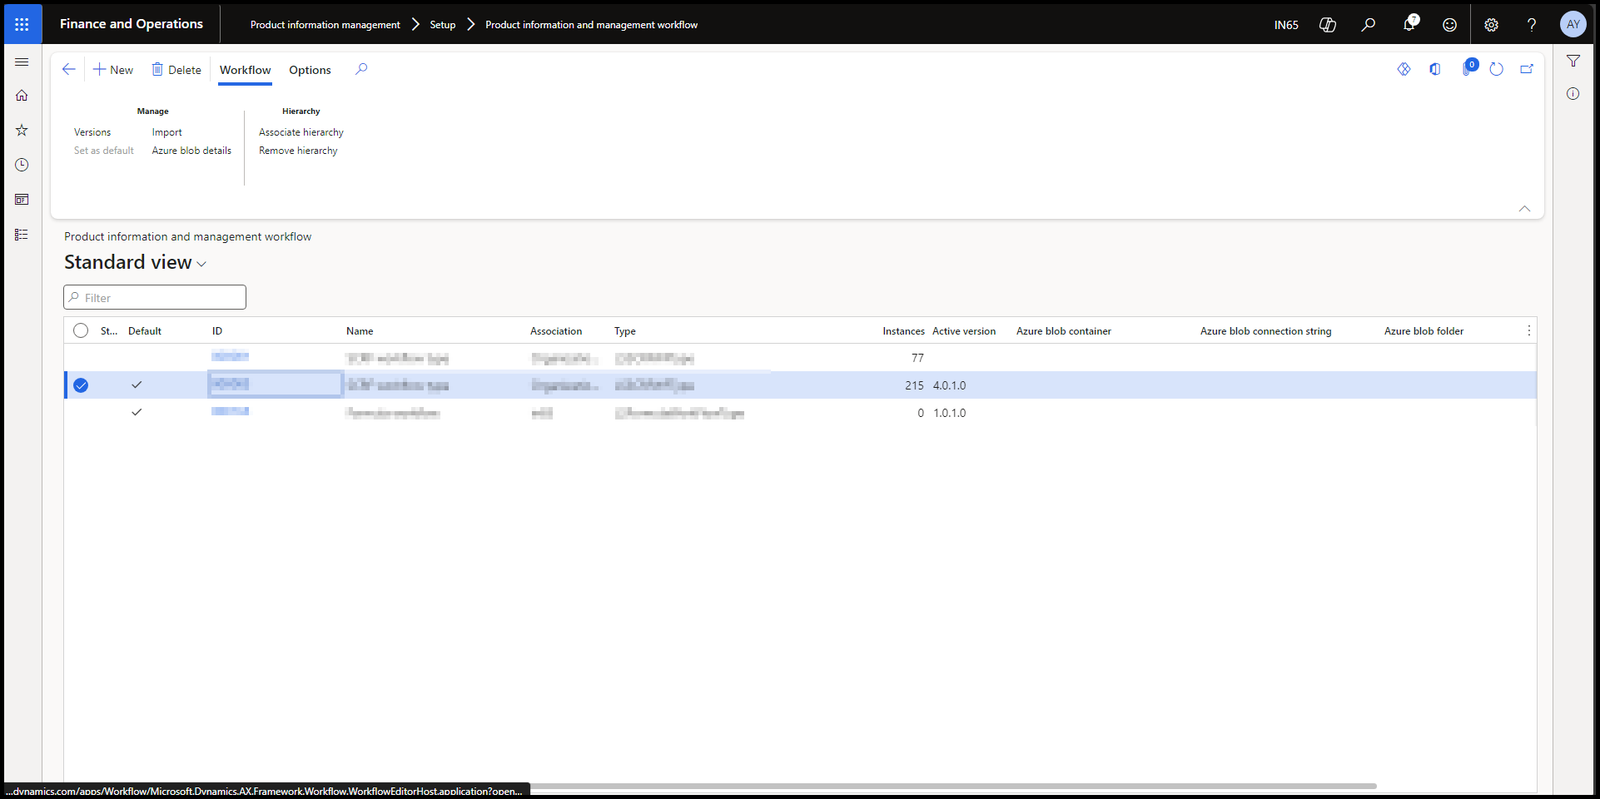
Click on the New button, you will see the list of workflow available in that module

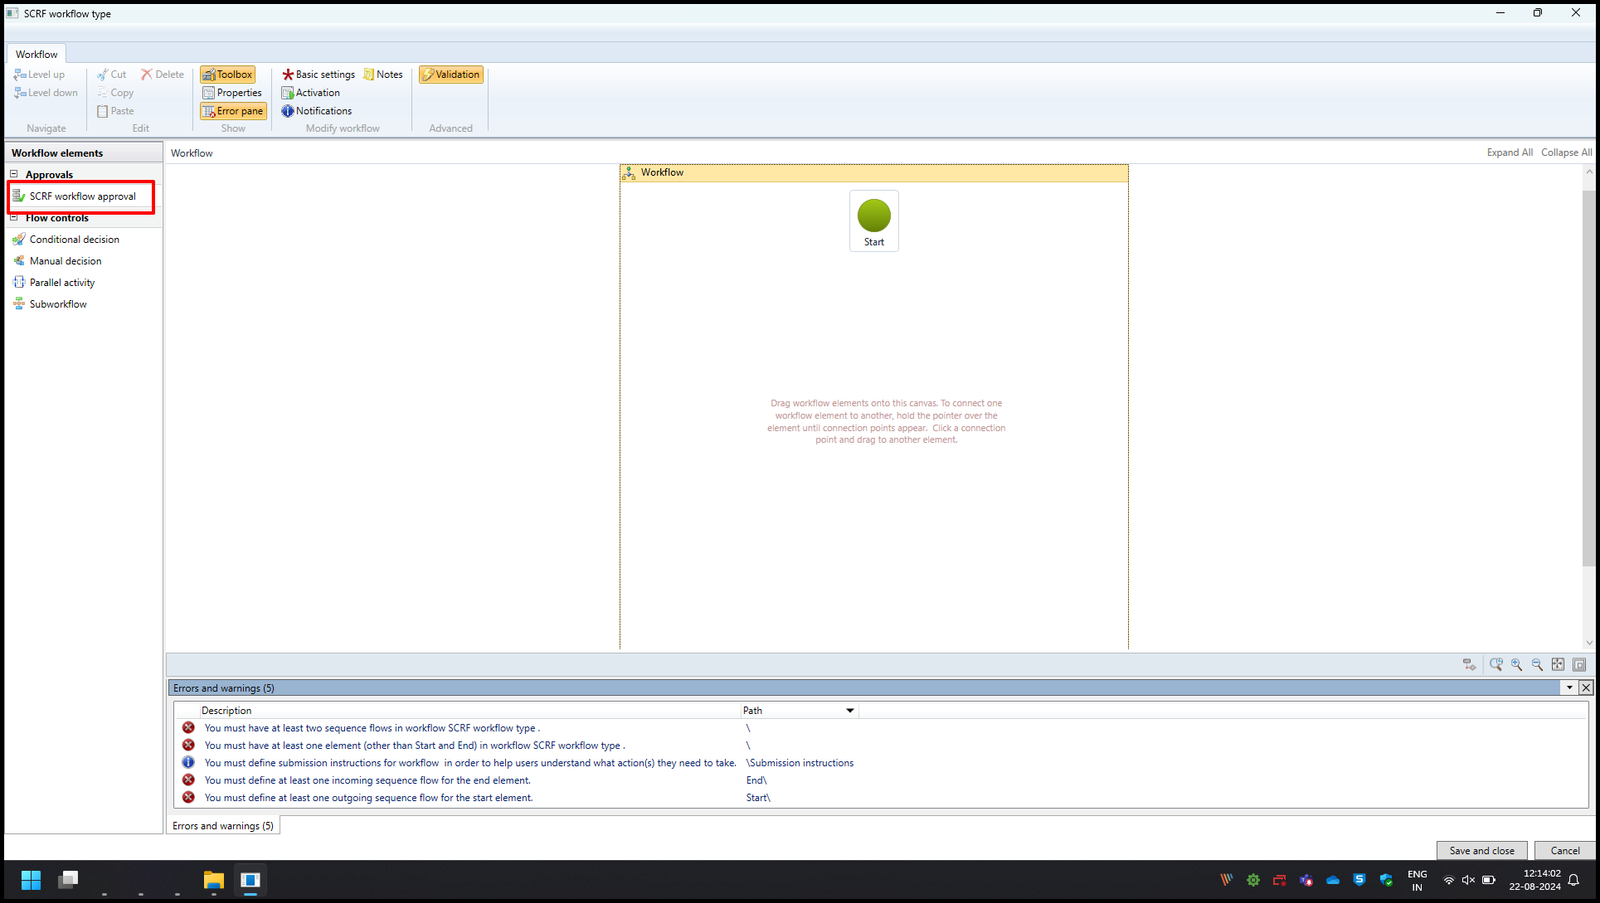
We can see the ‘SCRF workflow type’ that we created above, click on it.
Now a sign-in screen will open login to your account with your email ID. Enter the credentials and wait for some time(3-4 minutes), and a new window will pop up like below.
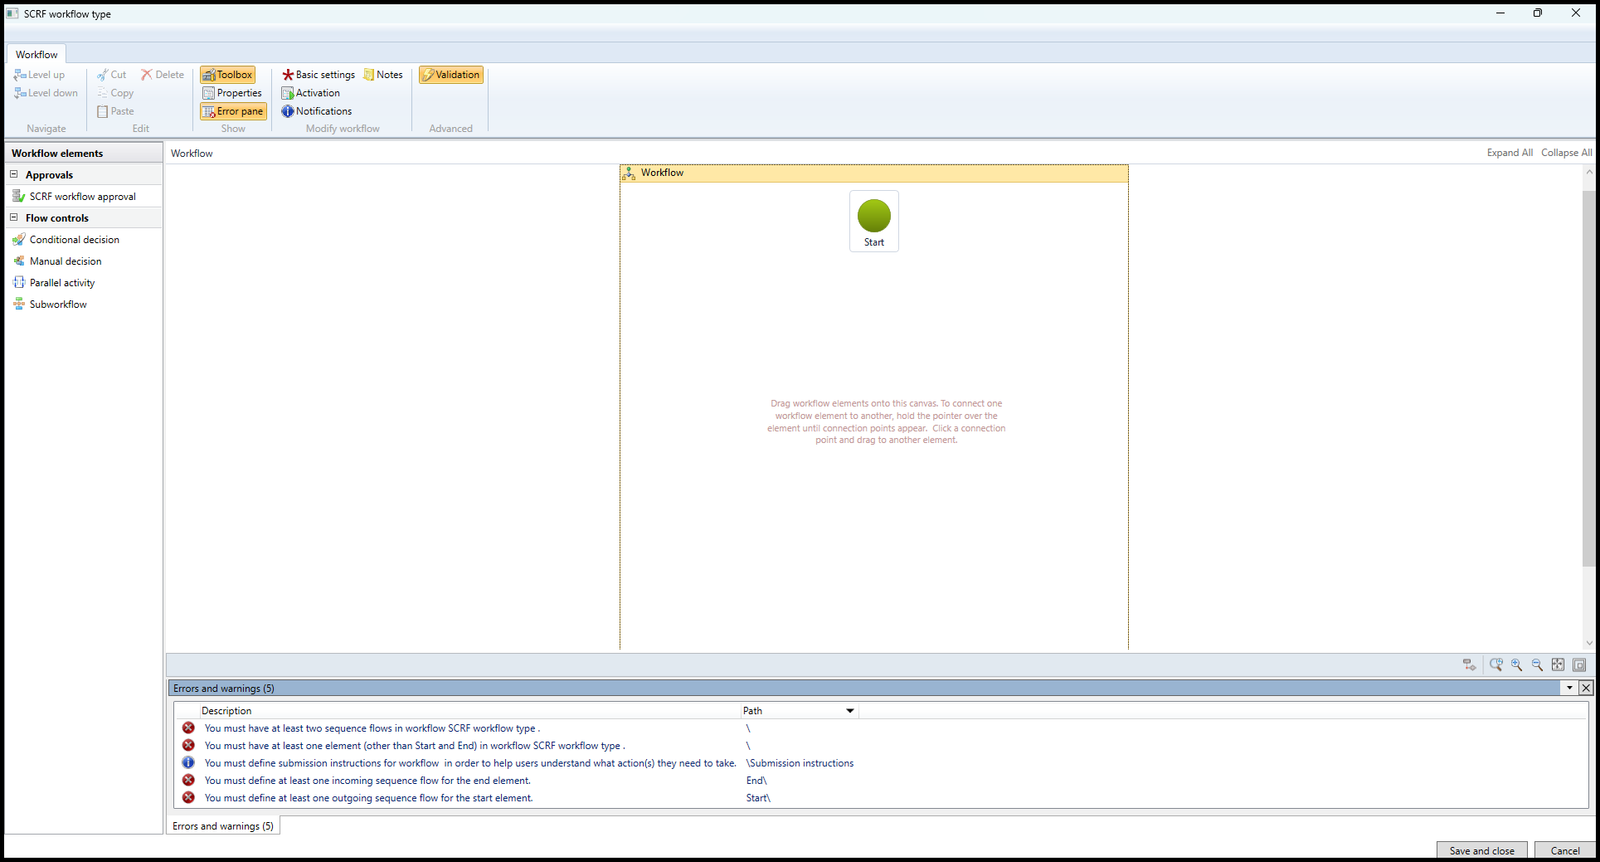
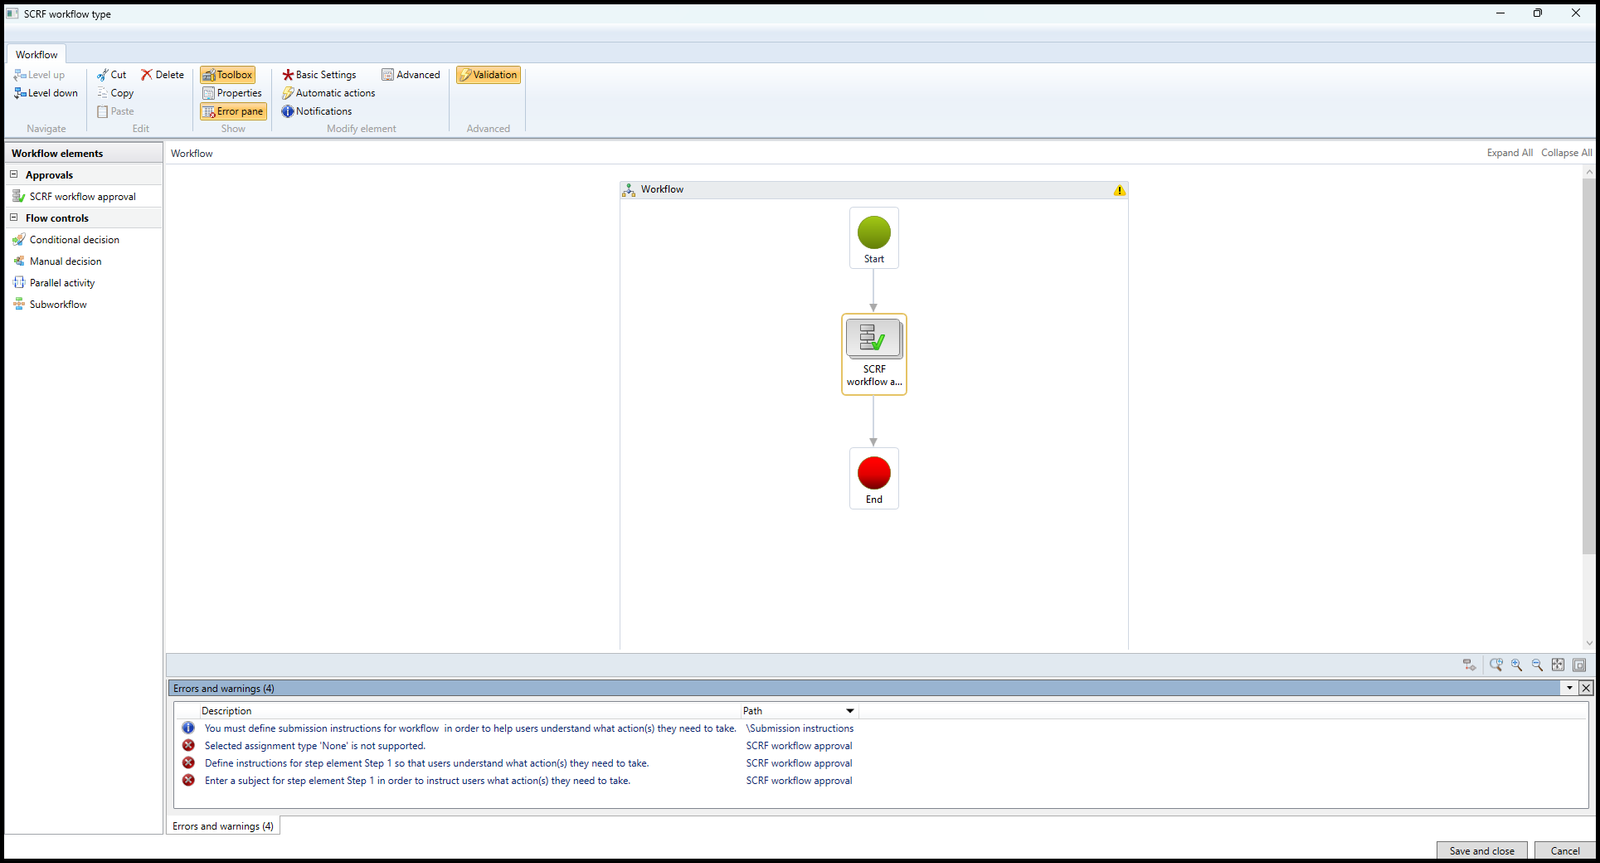
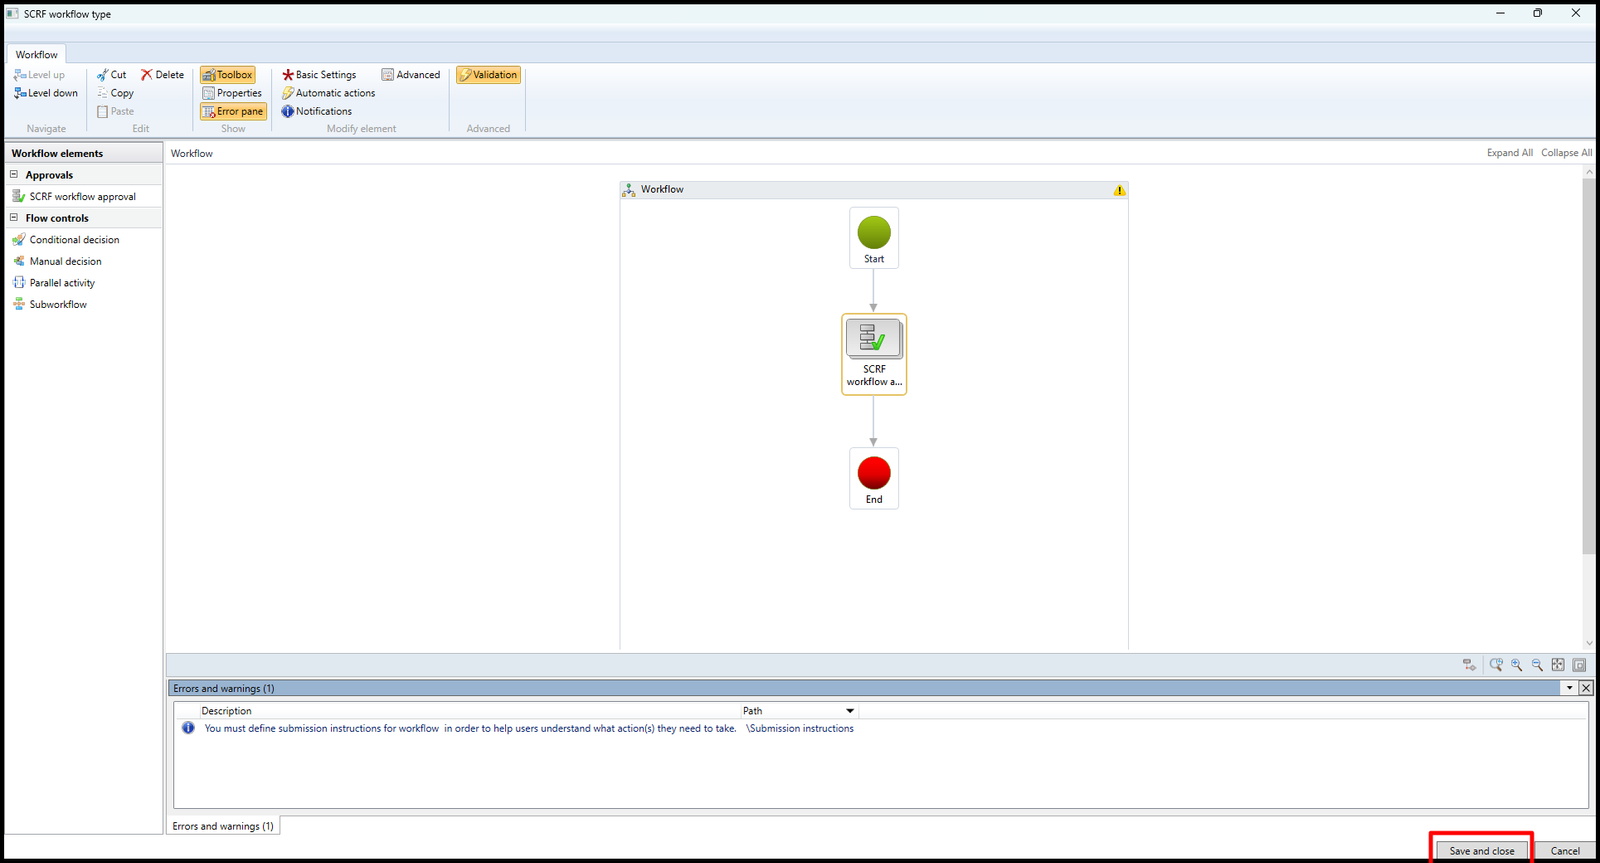
Now drag and drop approval (in my case SCRF workflow approval) from the left side to the center.
Now join the start with the approval and approval with the end as shown below.
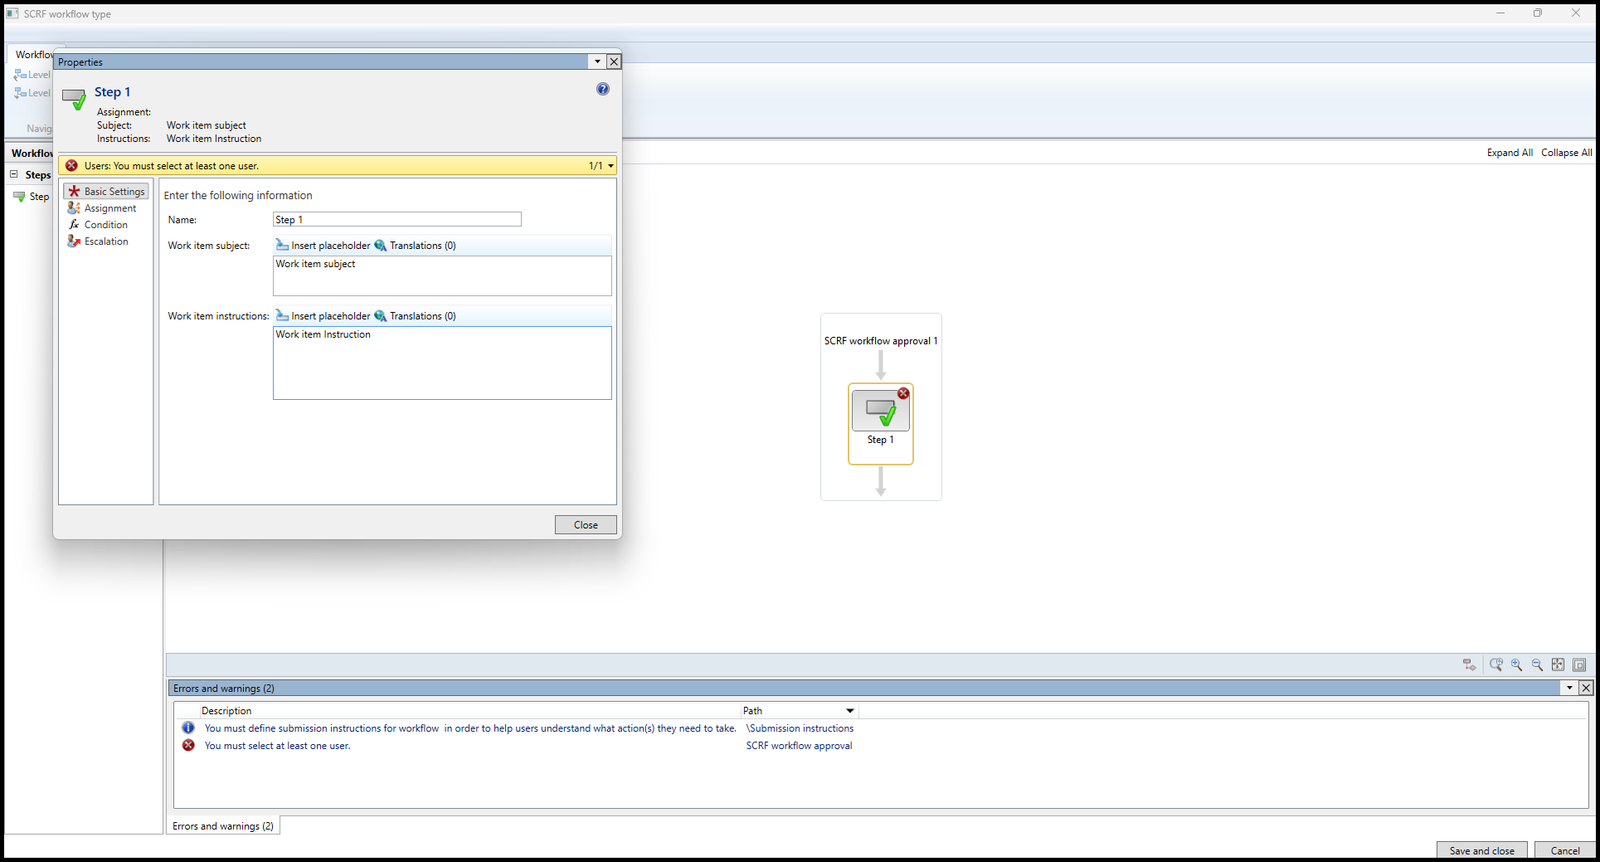
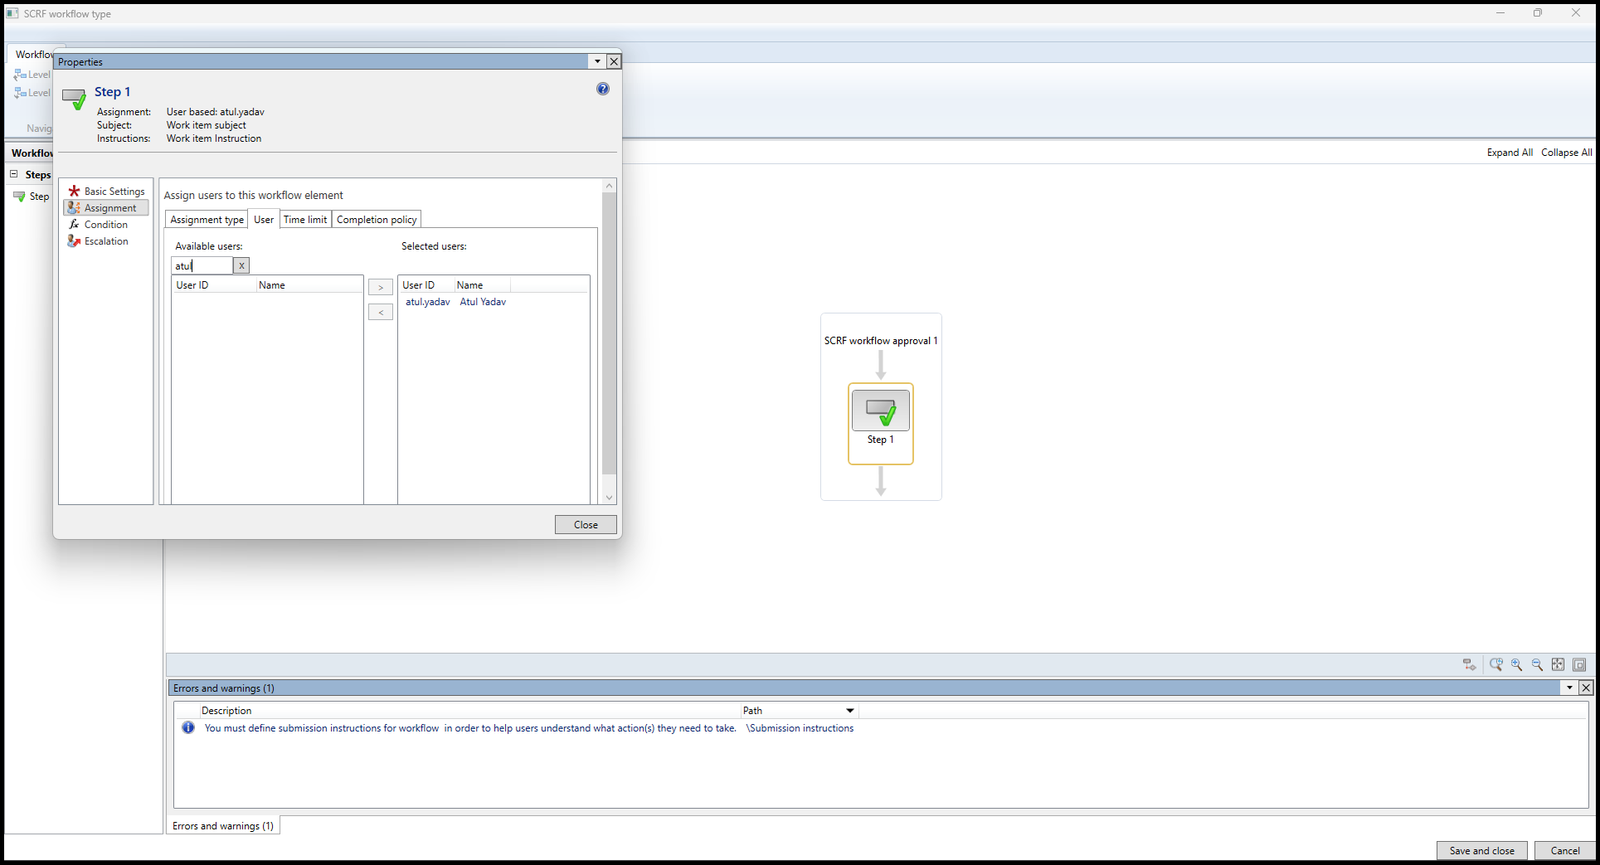
Now for the final part double-click on approval and, right-click properties, fill in the Work item Subject and Instruction as shown below
now click on properties of approval and select the assignment as shown below.
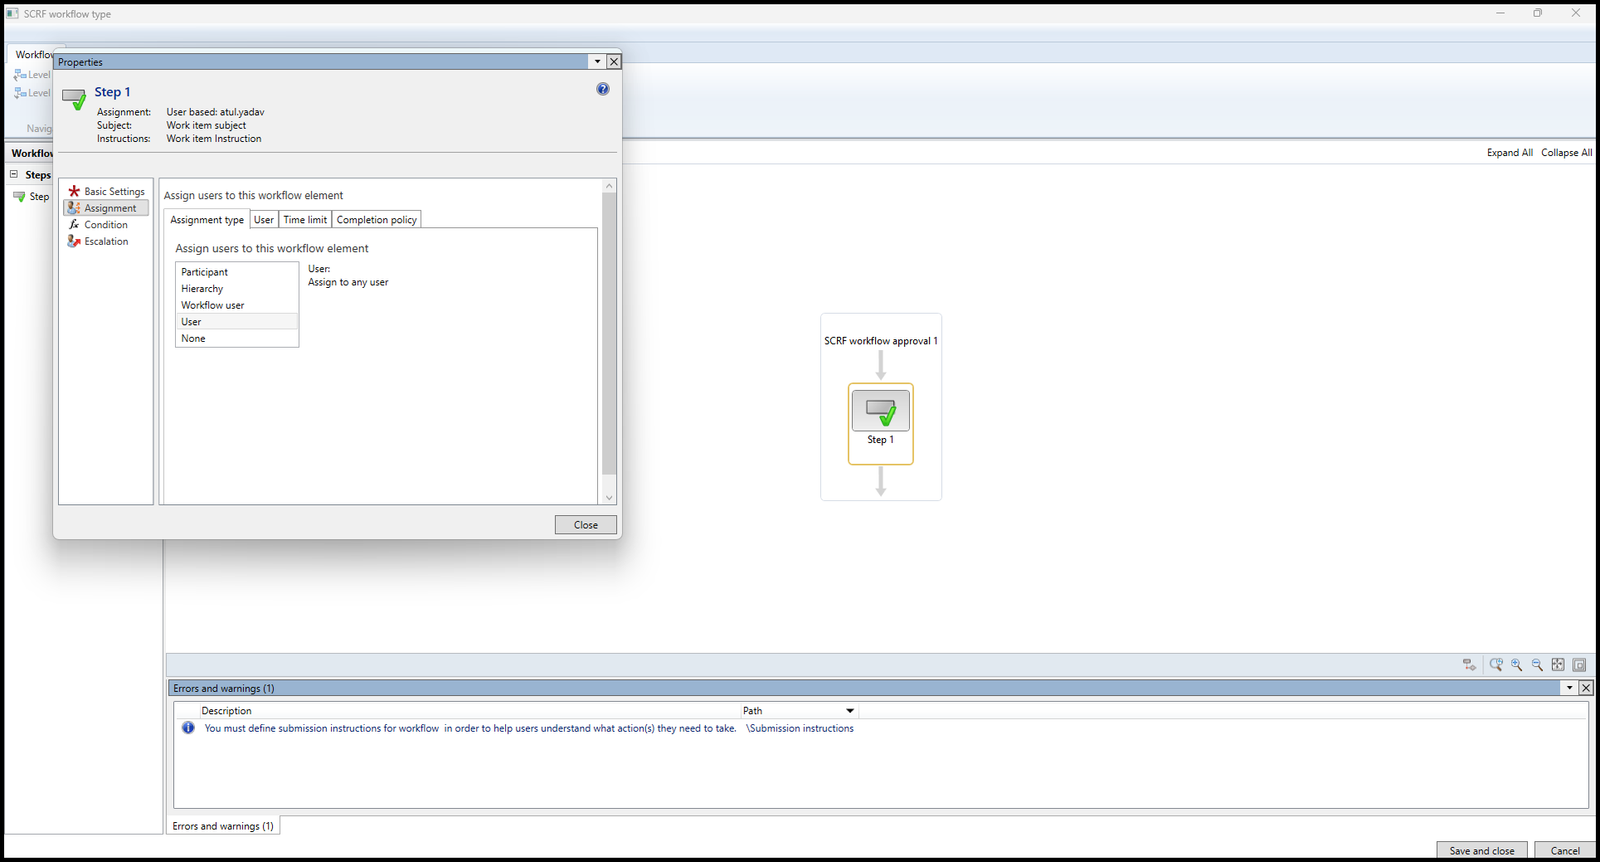
then select the user and assign a user. In my case, I am assigning Atul as a user as shown below.
Now click on save and close as shown below
Once it is closed you can see the workflow in the ‘Product information and management workflow’ form as shown below.
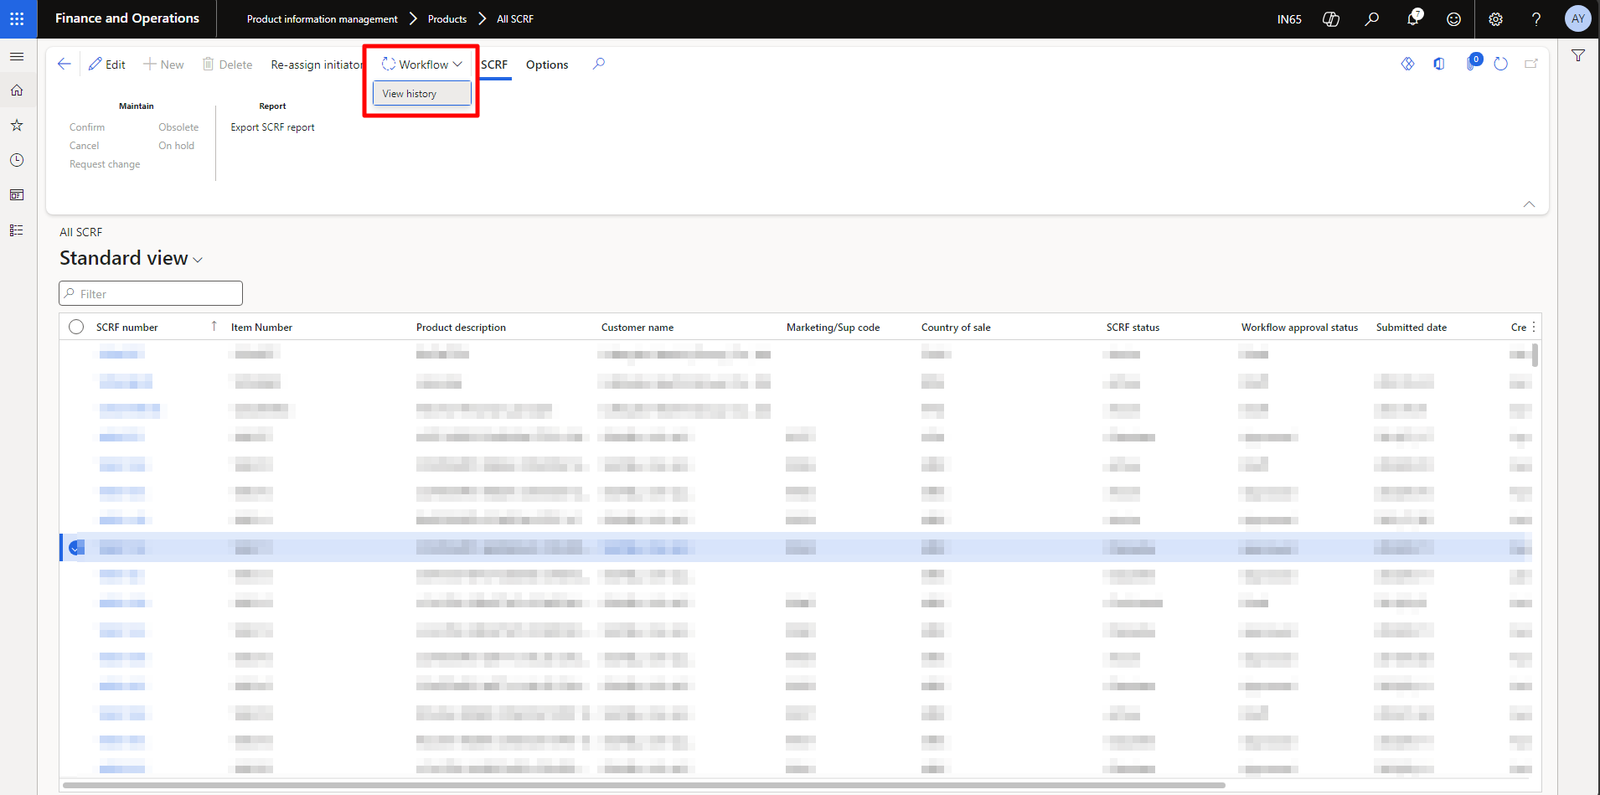
Now onwards, your form will be shown as below
You can also check out my previous blog: Create a custom service in d365 FO
Need help? Connect Atul
His proficiency in Azure integration further distinguishes his capability, facilitating seamless connections with Dynamics 365 F&O and enhancing business operations. Committed to project success, he provides ongoing support and shares industry insights through his blog, contributing to the professional community's growth.
- Key Vault parameters in Dynamics 365 F&O - July 29, 2025
- User-based authentication RSAT - July 22, 2025
- Boost First-Load Performance in Dynamics 365 F&O with IIS Preload - July 15, 2025

Hi Atul, excellent blog.
In this blog you discussed about Custom workflow.
I like to know If I need to customize any stnd. workflow like AR or AP modules. Please insist me what to follow end to end. If any blogs you have kindly share please.
thanks in advance!
Hi Arpan,
Thank you for the kind words.
Regarding Custom workflow, it depends on the requirement, let’s say you want to put some validation before submitting the workflow then you will write code on the canSubmitToWorkflow method of the table, this is one of the typical scenarios that we face on a day-to-day basis.
Thanks Atul for the response.
Actually, I asked you diff question – if we like to modify any standard workflow then what to be followed to achieve this?
Kindly share me any link where I can get the step by step.
thanks in advance!
Hi Arpan,
Thank you for bringing this up. I initially thought you were considering customizing the standard workflow. Since the existing workflow seems to function well, I’m curious to understand the reasons for a complete change. Could you please share the use case scenario?
Hi Atul,
Thank you for responding. Just for the knowledge purpose I am asking. If suppose any modifications comes from the standard workflow from any modules like AR, AP etc. then how will i handle this?
any idea on this?
thanks in advance!
Hi Arpan,
I think just create a custom workflow as shown above and update the workflow type in the form(extension) design property.
PS: Never tried it.