
- First step on How to send email via x++ code D365 FO, we will create a class and a static method in it as shown below
/// <summary>
/// Send mails
/// </summary>
class LSSendingMail
{
    /// <summary>
    /// Send EMail
    /// </summary>
    /// <param name = "_toEmailid">_toEmailid</param>
    /// <param name = "_template">_template</param>
    /// <param name = "_placeHolderMap">_placeHolderMap</param>
    public static void sendMail(LSEmailAddress _toEmailid, SysEmailSystemId _template , Map _placeHolderMap)
    {
        #define.language('en-us')
        SysOutgoingEmailTable   outGoingEmailTable;
        SysEmailSystemTable SysEmailSystemTable = SysEmailSystemTable::find(_template);
        SysEmailMessageSystemTable SysEmailMessageSystemTable = SysEmailMessageSystemTable::find(_template,#language);

        str messageBody = SysEmailMessageSystemTable.Mail;
        str subject = SysEmailMessageSystemTable.Subject;

        messageBody = SysEmailMessage::stringExpand(messageBody, _placeholderMap);
        subject     = SysEmailMessage::stringExpand(subject, _placeholderMap);

        outgoingEmailTable.EmailItemId                  = EventInbox::nextEventId();
        outgoingEmailTable.TemplateId                   = _template;
        outgoingEmailTable.Sender                       = SysEmailSystemTable.SenderAddr;
        outgoingEmailTable.SenderName                   = SysEmailSystemTable.SenderName;
        outgoingEmailTable.Recipient                    = _toemailid;
        outgoingEmailTable.Subject                      = subject;
        outgoingEmailTable.Message                      = messageBody;
        outgoingEmailTable.Priority                     = SysEmailSystemTable.Priority;
        outgoingEmailTable.WithRetries                  = true;
        outgoingEmailTable.RetryNum                     = 0;
        outgoingEmailTable.UserId                       = curuserid();
        outgoingEmailTable.Status                       = SysEmailStatus::Unsent;
        outgoingEmailTable.LatestStatusChangeDateTime   = DateTimeUtil::getSystemDateTime();
        outgoingEmailTable.insert();

    }

    /// <summary>
    /// Send email attachment
    /// </summary>
    /// <param name = "_toEmailid">_toEmailid</param>
    /// <param name = "_template">_template</param>
    /// <param name = "_placeHolderMap">_placeHolderMap</param>
    /// <param name = "docuRef">docuRef</param>
    /// <param name = "_fileType">_fileType</param>
    /// <returns>boolean</returns>
    public static boolean sendMailwithAttachment(LSEmailAddress _toEmailid, SysEmailSystemId _template , Map _placeHolderMap,DocuRef docuRef, Str _fileType = 'application/pdf')
    {
        boolean messageSent;
        #define.SMTP('SMTP')
        Map sysMailers = SysMailerFactory::getMailers();
        SysEmailSystemTable SysEmailSystemTable = SysEmailSystemTable::find(_template);
        SysEmailMessageSystemTable SysEmailMessageSystemTable = SysEmailMessageSystemTable::find(_template,SysEmailSystemTable.DefaultLanguage);

        str messageBody = SysEmailMessageSystemTable.Mail;
        str subject     = SysEmailMessageSystemTable.Subject;

        var messageBuilder = new SysMailerMessageBuilder();

        messageBuilder.addTo(_toEmailid);
        messageBuilder.setSubject(SysEmailMessage::stringExpand(subject, _placeholderMap));
        messageBuilder.setBody(SysEmailMessage::stringExpand(messageBody, _placeholderMap));
        messageBuilder.setFrom(SysEmailSystemTable.SenderAddr);

        //var message = messageBuilder.getMessage();

        messageBuilder.addAttachment(DocumentManagement ::getAttachmentStream(docuRef),docuRef.Name + '.pdf',_fileType);
        SysIMailer mailer;
        mailer = sysMailers.lookup(#SMTP);

        SysIMailerNonInteractive nonInteractiveMailer = mailer;
        messageSent = nonInteractiveMailer.sendNonInteractive(messageBuilder.getMessage());

        return messageSent;

    }

}
2. Now to show you the example of how to send email via x++ code D365 FO, we will create a runnable class
internal final class TestAY
{
    /// <summary>
    /// Class entry point. The system will call this method when a designated menu
    /// is selected when execution starts and this class is set as the startup class.
    /// </summary>
    /// <param name = "_args">The specified arguments.</param>
    public static void main(Args _args)
    {
        #define.User('User')

        Map placeHolderMap = new Map(Types::String, Types::String);
        placeHolderMap.insert(#User, "Atul");
        LSSendingMail::sendMail('atul.yadav@lifestyles.com', 'Safety Cal', placeHolderMap);
    }
}
3. Now for 3rd step on How to send email via X++ code D365 FO, for the above code to run you need to set up an email template named “Safety Cal”
a. Go to System email templates

b. You will see a form below
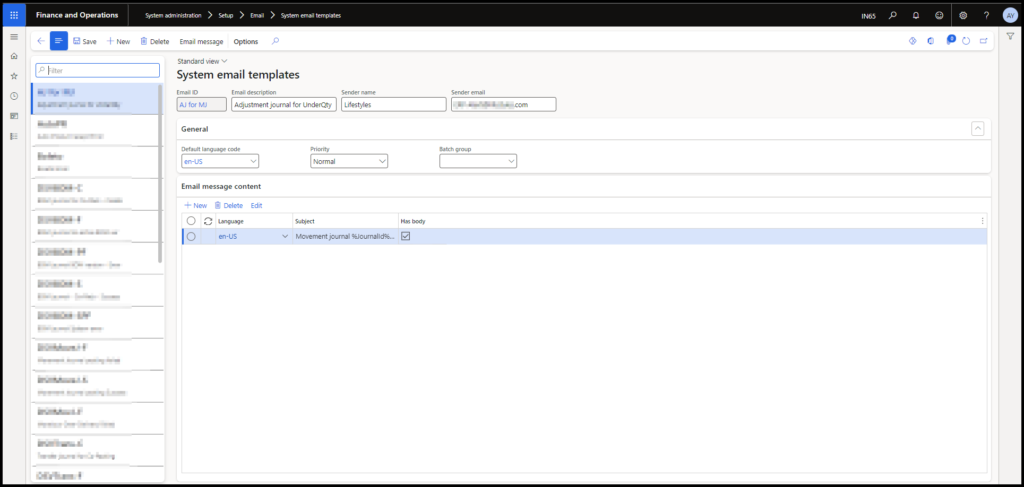
c. Now click on new and create a new template as shown below
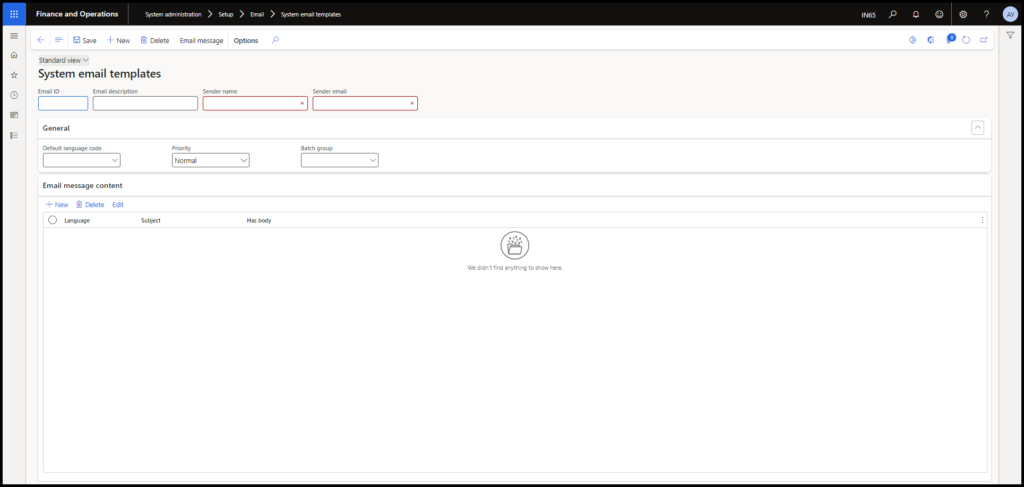
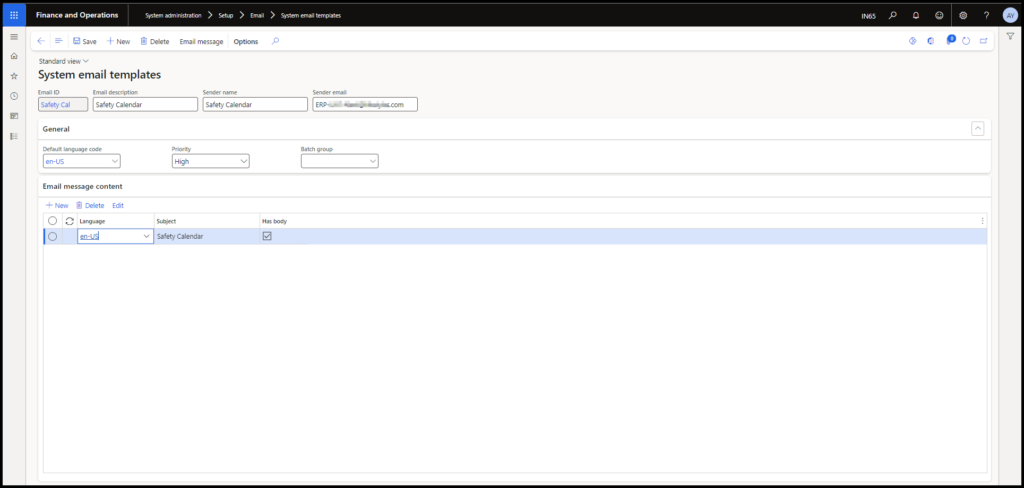
d. I am filling as below

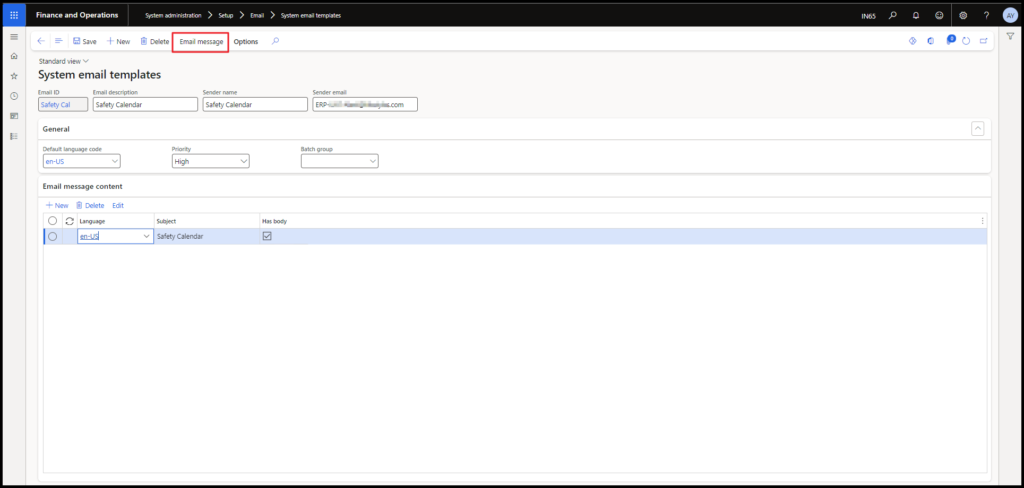
e. Once created click on the email message as shown below
f. once you click, you will see a new form like below
g. Here we need to upload the HTML format of our email, I have already attached mine
My HTML sample below
<!DOCTYPE html>
<html lang="en">
<head>
<meta charset="UTF-8">
<title>Safety Calendar Reminder</title>
</head>
<body>
<p>Dear %user%,</p>
<br>
<p>A gentle reminder to promptly complete your Safety Calendar entries, due by the end of this week. Your timely contribution is vital for our collective safety and compliance.</p>
<p>For assistance or queries, please contact us.</p>
<br>
<p>Best regards,</p>
<p>Microsoft Dynamics 365</p>
</body>
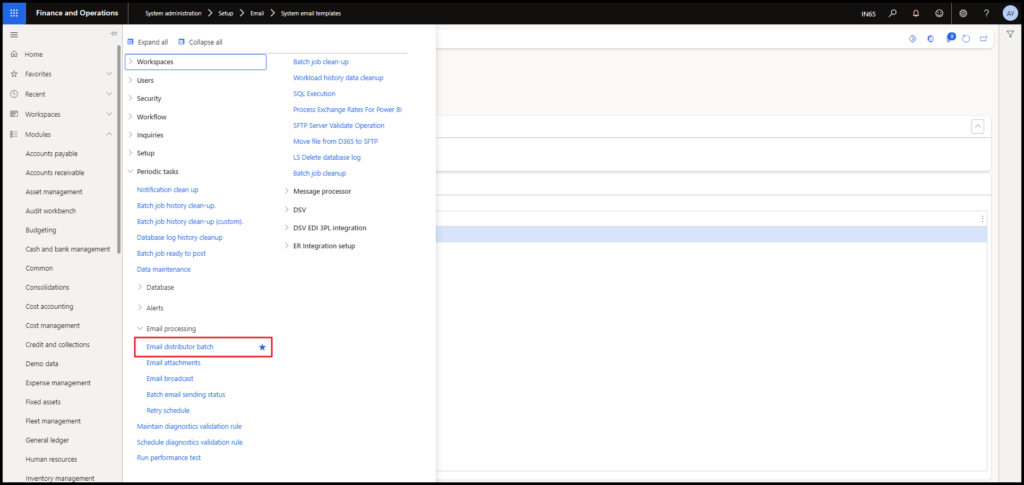
</html>4. Now for the last step on How to send email via X++ code D365 FO, you need to run an Email distributor batch, the path shown below
Now just run the runnable class that we created in Step 2
Check out my previous blog: update_recordset in Microsoft Dynamics 365 F&O
Need help? Connect Atul
His proficiency in Azure integration further distinguishes his capability, facilitating seamless connections with Dynamics 365 F&O and enhancing business operations. Committed to project success, he provides ongoing support and shares industry insights through his blog, contributing to the professional community's growth.
- Key Vault parameters in Dynamics 365 F&O - July 29, 2025
- User-based authentication RSAT - July 22, 2025
- Boost First-Load Performance in Dynamics 365 F&O with IIS Preload - July 15, 2025
Excellent writeup.
Thank you Reed
It’s a useful example.
Can this coding be used as well if the email provider uses Graph?
Thank you